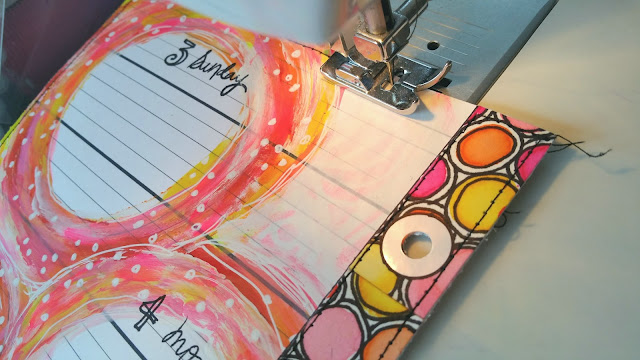
If you haven't been at StencilGirl Talk, you need to! I wrote a guest post there, and it was all about how I made an Artsydori and another project in my unPlanner using StencilGirl stencils.
You have come to the right place! I am hosting a GIVEAWAY!!
Yes, I will give away one of these Artsydori sets to one lucky person in celebration of my new adventure with the StencilGirl Creative Team!
See the details at the end of this post.
Artsydori #1 is on StencilGirl Talk blog, so you need to go visit me there to see it. :)
Artsydori Set #2
Yes, I will give away one of these Artsydori sets to one lucky person in celebration of my new adventure with the StencilGirl Creative Team!

See the details at the end of this post.
Artsydori #1 is on StencilGirl Talk blog, so you need to go visit me there to see it. :)
Artsydori Set #2
the Artsydori
It measures like the original Traveler's Notebook by Midori: approximately 9 inches (23cm) tall and about 5 1/4 inches (23cm) wide
funky stitching, generous and well-placed pen loop
The inside with aqua coloured quality elastic.
The Artsydori fits four of my generously sized notebooks inside.
Four coordinating hand bound notebooks to go inside. These are funky machine stitched with matching thread. The inside pages are plain white cardstock.
All the designs are made using StencilGirl stencils!
Links to the stencils used to make this Artsydori and coordinating notebooks:
To make your own Artsydori, do check out this great class where I learned to make them!!
JunqueArt
Here I have another one that I just made last week.
Artsydori #3
Some funky notebooks. I love these new stencils I used for this, designed by Mary Beth Shaw!
April 2016 Club stencils

I used the amazing new stencils by Mary Beth Shaw. They come in the
April StencilGirl Club set.
I highly recommend this club! You get exclusive stencils every month. Check it out HERE.
I also used stencils from two previous club month sets:
September 2015
February 2016
I don't have the matching notebooks for the above dori, so if you win, and this one is your favorite, it'll just be the dori, not a set.
I have started to make some to sell from time to time, so if you see one that you'd like to purchase, please email me.
customscrapbooksbyanna (at) gmail (dot) com
This one is sold, so you can't pick this one as your favorite (#1,2,3 or 4), but I wanted to show this one to you too.
Here are the instructions to enter the giveway:
How: In the comment section, tell me which Artsydori is your favorite. You can choose the one on the StencilGirl Talk blog as well. In order to contact you if you are the winner, leave your email address like this: customscrapbooksbyanna (at) gmail (dot) com. If you are uncomfortable leaving your address, you can email me as well. My email address is the one I just mentioned. :)
When: I will draw randomly from all the comments and emails on Friday, May 5th, 2016 at noon.
This giveaway is open to anyone in Canada or USA. So sorry about those overseas. Shipping would kill me. :(
Why: to celebrate my new adventure with the Stencil Girl Creative Team! :) Whoot!!
To see more Artsydori posts see here:
Artsydori Land
Inspiration Wednesday 2016 Week One
Inspiration Wednesday Handmade Journal
So happy that you chose to visit me here!
Bless you!
♥♥♥ Anna ♥♥♥
Here I have another one that I just made last week.
Artsydori #3
And here is the dori with the coordinating notebooks which I had fun making with gelliprints and StencilGirl stencils!
Some funky notebooks. I love these new stencils I used for this, designed by Mary Beth Shaw!
April 2016 Club stencils

The coloring was hard to capture on this one. The pink and black should look more purple, and the yellow is actually more of a green color.
Artsydori #4
I used the amazing new stencils by Mary Beth Shaw. They come in the
April StencilGirl Club set.
I highly recommend this club! You get exclusive stencils every month. Check it out HERE.
I also used stencils from two previous club month sets:
September 2015
February 2016
I don't have the matching notebooks for the above dori, so if you win, and this one is your favorite, it'll just be the dori, not a set.
I have started to make some to sell from time to time, so if you see one that you'd like to purchase, please email me.
customscrapbooksbyanna (at) gmail (dot) com
This one is sold, so you can't pick this one as your favorite (#1,2,3 or 4), but I wanted to show this one to you too.
Here are the instructions to enter the giveway:
How: In the comment section, tell me which Artsydori is your favorite. You can choose the one on the StencilGirl Talk blog as well. In order to contact you if you are the winner, leave your email address like this: customscrapbooksbyanna (at) gmail (dot) com. If you are uncomfortable leaving your address, you can email me as well. My email address is the one I just mentioned. :)
When: I will draw randomly from all the comments and emails on Friday, May 5th, 2016 at noon.
This giveaway is open to anyone in Canada or USA. So sorry about those overseas. Shipping would kill me. :(
Why: to celebrate my new adventure with the Stencil Girl Creative Team! :) Whoot!!
To see more Artsydori posts see here:
Artsydori Land
Inspiration Wednesday 2016 Week One
Inspiration Wednesday Handmade Journal
So happy that you chose to visit me here!
Bless you!
♥♥♥ Anna ♥♥♥


