Showing posts with label tutorial. Show all posts

Tuesday, May 24, 2016

May Weeks 3 and 4 in my unPlanner

Back again with more unPlanner pages. I'm starting to think these should all just be art journal pages, instead of a calendar. Not sure I want to write on these!

Go HERE if you want more information or to register for The Documented Life Project 2016: The unPlanner!

Been working like mad on a special project, so my blogging has fallen a bit behind. I'll give you a quick run down of these May pages.

May 15-21


These started as gelliprints. I sat, looking at the designs on the page, wondering how I could add more detail before making journaling spots. Then my mind went to the simplistic artsy flowers I have seen lately on Pinterest and Instagram. Like these designs: Country Flowers by Mia Charro.
I started painting some, and I found that I actually kinda knew how to do this! LOL! 


Lots of accents added with stencils from StencilGirl, namely this amazing set by Mary Beth Shaw!


I added some blending with paint and my fingers too.


Added lots of doodles with black sharpie and white gel pen as well.

May 22-28


1. I started with two Gelliprints. I used a few stencils for the gelliprinting. Mainly Circles Layer Me by Carolyn Dube and DNA Strands by Mary Beth Shaw.

2. I cut down the papers to fit my binder.
3. To unify the two pages, I pieced a part of the print of the left side to the right page. 

4. I used a handmade flower mask to outline the flower with a black Stabilo All. 

5. I activated the pencil to get a messy look. 

6. I took purple, pink, white and aqua paint and brushed the flower petals and center to add color and layers. 

7. Added some stenciling with a StencilGirl mini stencil to the petals. 


8. Made green circles for "leaves" stemming out from the flower. 

9. Messily scribbled around the flower and doodled circles all over. 

10. Added lines for the days with a black Stabilo All. 

11. Sewed around edges and the lines with black thread. 

12. Added circle days from a printable. 

13. Outlined them with the Stabilo too. 

14. Wrote in the days of the week with a black Pitt pen.


I have a similar tutorial for flowers like these HERE.

And there are two weeks in my unPlanner. I'm a little behind with the challenge part of this project, which I hope to complete next time I post here on the blog. :)\
Thanks so much for visiting!

♥♥♥  Anna  ♥♥♥

Tuesday, April 5, 2016

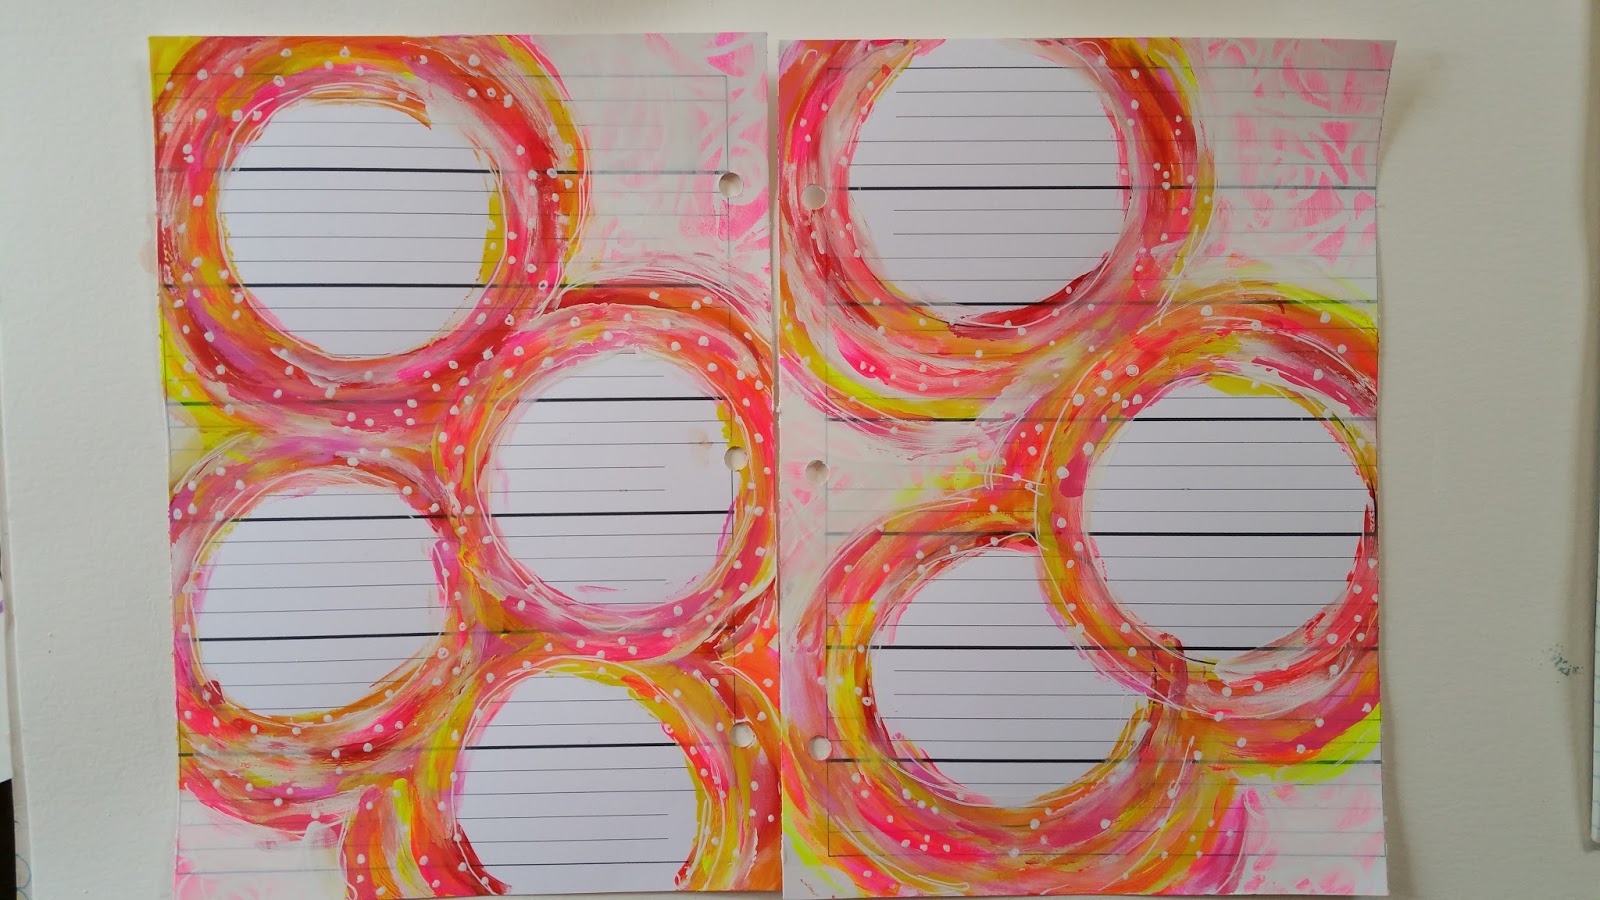
Finger Painted Circles Weekly View Tutorial

I'm always looking for a new look for my weekly views in my unPlanner, one that accommodates my journaling spots. I am liking this one very much, so I have decided to give you a step-by-step.

This features:

- An analogous color scheme. I used red, pink, orange and yellow.
-7 circles fit randomly on two pages. My pages are 6"x8".
- Downloads from the Art5 unPlanner kit, but any lined pages would do.
-My watercolor bubbles paper for the reinforcement strips. See HERE for that tutorial.
-Sewing around edges and the reinforcement strips
-Day of the week stamps. I used the ones that come in the Art5 unPlanner kit.


Are you ready? Here goes:

Materials needed:
1.Paints in an analogous color scheme, meaning colors that are beside each other on the color wheel.
2. Lined paper
3. circle template - I used a roll of masking tape. It measures around 4" in diameter.
4. black Sharpie fine-line marker
5. stencil for the background: I used Tim Holtz Scribbles
6.white Uniball Signo gel pen
7. the watercolor bubbles paper
8. sewing machine
9. black thread
10. sponge
11. glue stick
12. paper trimmer
13. black ink pad
14. days of the week stamps - I used Rae Missigman's stamps that came in the unPlanner kit.
15. hole punch to fit for binder
16. hole reinforcements


Step 1: print out the downloads onto cardstock paper.
Step 2 : draw 4 circles on one page, and three on the other in a random way.


Step 3: Started painting circles with your fingers around the black ones you drew in. Use all the colors you picked. Paint with a very light hand, with only a bit of paint on your finger. This way you won't have bold slashes of color. You want each color to be broken up, random on the paper.


Tip: I find the yellow is too strong here, so below, I added more light touches of different colors, to add more dimension.


Keep adding more paint until you have a nice blend and coverage of painty circles. I like lots of variation of color for my circles. Let dry completely.


Step 4: With a sponge, add paint through the stencil to the remaining white space around the circles.


Step 5: I found the hot pink competed too much with the painty circles, so I added white paint over it. 
Step 6: Draw random dots with Uniball Signo gel pen on the circles.


Step 7: Draw broken circles on top of the circles, focusing on the inside circle and outer.


Step 8: Stamp the days of the week in the circles.


Step 9: doodle in the numbers with black Sharpie.


Step 10: trim the watercolor bubble paper into 3/4" strips and glue to reinforcement spines on both pages.


Step 11: punch the holes to fit binder.


Step 12: Add white reinforcement stickers to each hole.


Step 13: outline the edges of the reinforcement strips and the circles with the Sharpie.


Step 14: Sew with black thread around each page and the edges of the reinforcement strips.


And you're done! Now you are ready to journal your days! 

If you haven't seen the unPlanner project details, do check out this awesome project HERE! 

I hope you enjoyed this tutorial. See you another time!

♥♥♥ Anna ♥♥♥

Thursday, May 29, 2014

Color Swatches Tutorial

Lately I have a thing for color swatches. It's a guide as to what colors you have in your stash of each art product. If it's a set you're collecting one at a time, this is perfect. Add the new color as you bring them home. Pictured below I colored in a circle for each Crayola pencil crayon I own. (I just bought a mega set of 60 pencils from Walmart.) If you want to know the steps in creating this, read on. :) 


I drew these on old book paper, punched them out, then glued them down in my Documented Life Project art journal. You could add them to any book. Maybe one dedicated to swatches would be cool!


Supplies:

- Book paper torn out of an old book (I tore mine from one of my art journals.)
- pencil crayons (or whatever medium you want swatches of. Examples: oil pastel set, watercolor pan set, watercolor pencils, Golden Acrylic fluid set, etc, etc.)
- 1 1/8" circle punch
- Sharpie marker Ultra-Fine point or any other fine-tipped pen or marker
- medium sized brush (a dollar store brand works fine)
- color wheel
- circle maker (a lid works too.)
- matte medium (I have the Liquitex brand.)
Note: If you're documenting water-based products, you'll want to use a fixative spray instead, as matte medium would make them bleed.
- glue stick
- art journal

Steps:

1. Take your circle maker or lid and draw as many circles as you have colors in your art set with the Sharpie. I drew 60.

2. Scribble another few circles around the first one.

3. Punch out your circles with the punch.

4. Glue them with a glue stick to the page of your choice. Arrange them according to the color wheel if you want. That had been my intention with mine, but I ran out of room, so it's a little disorganized. Make sure you have enough room to expand. I didn't, so they migrated to my other art journal pages, hence the mixing in of a different project I did. lol

5. Taking each pencil, color in each circle. Label color name (my favorite part) underneath the circle. I also added the name of the medium to the top of the page.

6. Take a brush and apply matte medium to the page to seal in the circles. (See Note in the supplies list. )

And you're done! :)


I created pictorial notes while reading The Book Thief, and glued the sketch paper to my art journal.


Happy Creating!
♥♥ Anna ♥♥