Showing posts with label Tutorials. Show all posts

Thursday, September 19, 2019

10 Day Gratitude Journal


EDIT: This journal is SOLD.

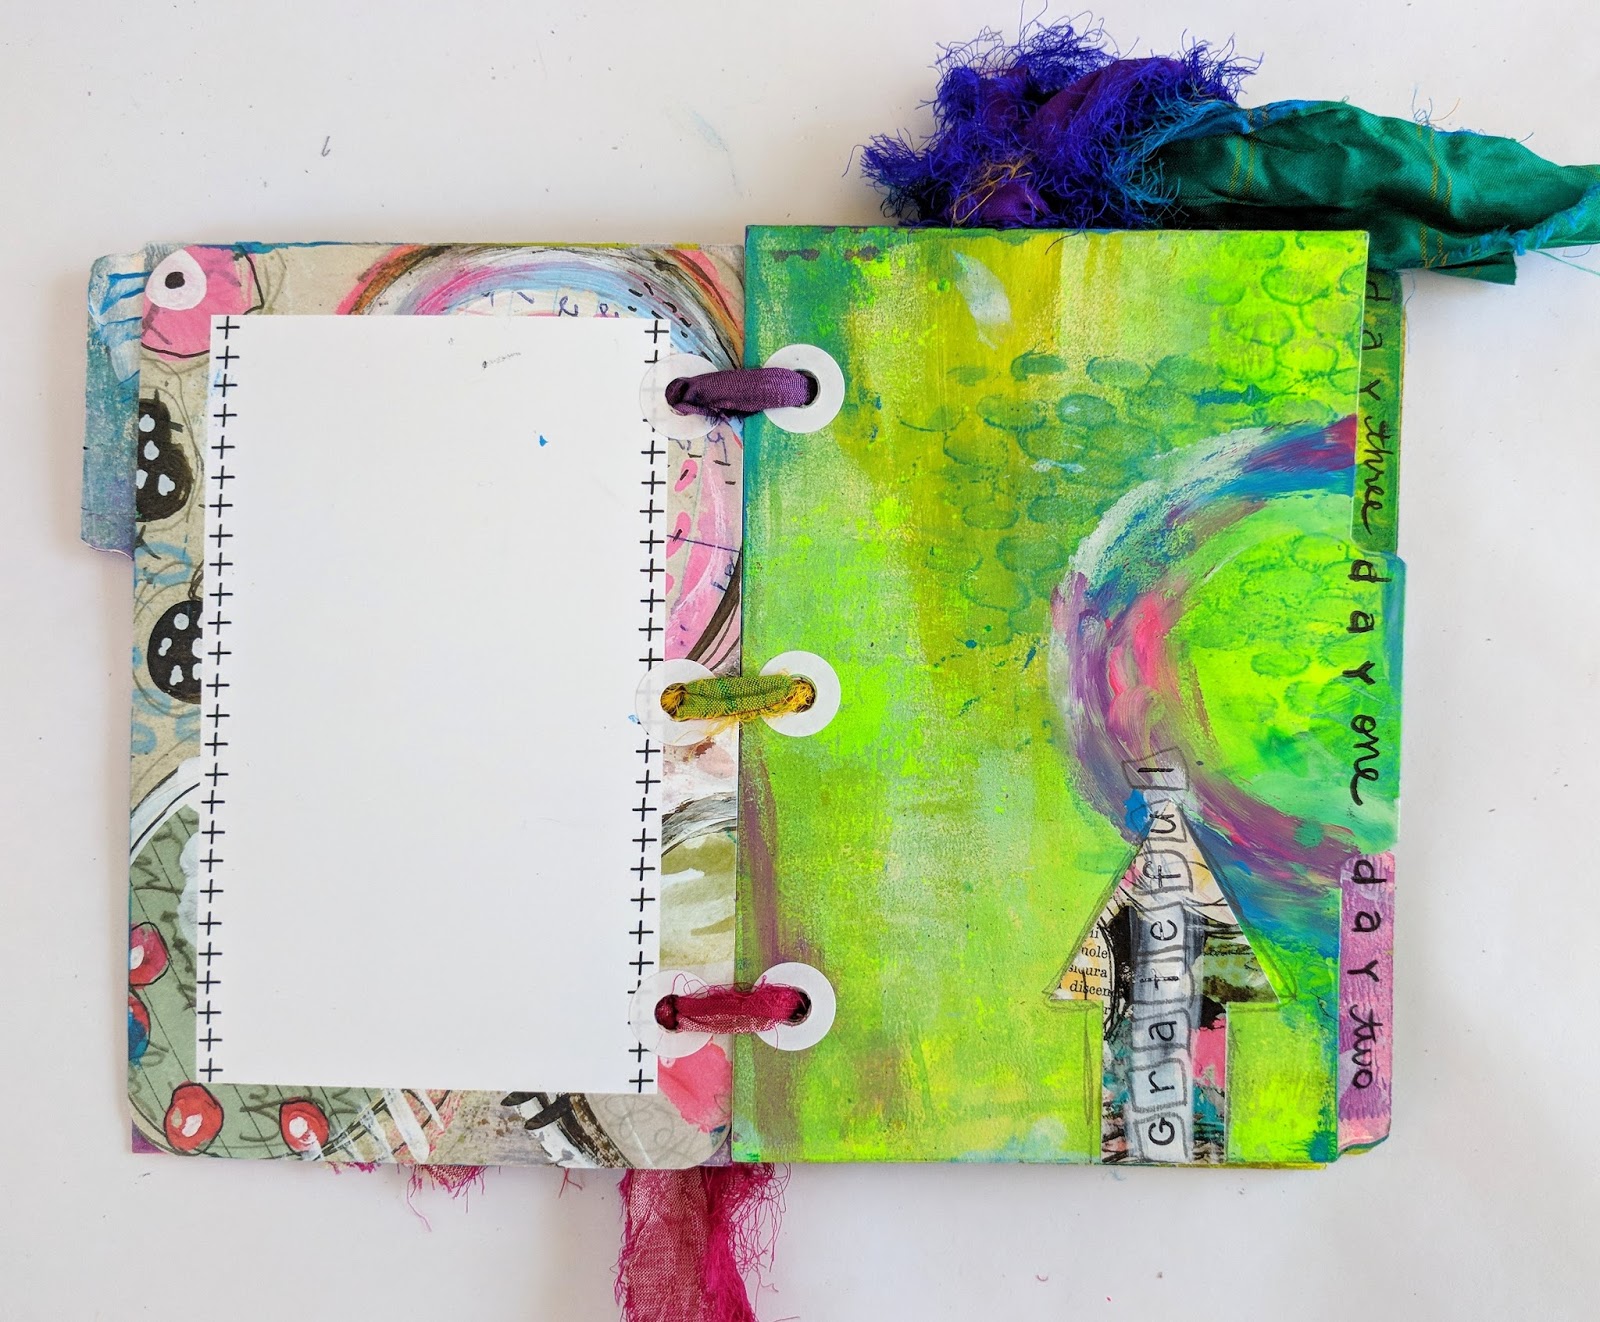
Almost two years ago, I made this fun little grateful journal, thinking I'd use it, but it's been sitting, looking all forlorn, in among my art stash. So, I've decided to sell it. I feel sad, as I always do when I part with something I've poured my heart and soul into, but I can't keep everything I make! 

I designed it while I was on the fabulous Roben-Marie Smith's design team. There's even an hour-long video of it on her YouTube channel. Check it out if you want to see the time-lapse. I recommend changing the playback speed to 2x if you don't have an hour to watch or be bored out of your mind. (Unless of course, you're curious how I achieved the look in detail. ;) ) 
See video 
 HERE

This could be a handy little journal to quickly document ten days of gratitude. I've seen many people do this on the socials. This is a great tool to practice thankfulness during the American thanksgiving season, or really, any time of the year is good too! Check out the hashtags #tendaysofgratitude #gratitudejournal #gratitudeproject 

This little book boasts 16 pages of painterly index cards, a few tags and some POPart cards designed by Roben-Marie Smith.  See photos below, which I've posted in order they appear in the book.

To purchase or if you have any questions, you can reach me at artfulstories@gmail.com or go to my Facebook page Artful Stories, or private message me on Instagram at @annawho.




♥♥♥  Anna  ♥♥♥

Saturday, June 30, 2018

Life Documented 2018 Project Tutorial Week 26

Hi all! Popping in here to let you know of a tutorial I made.

Week 26 Life Documented 2018 Project Tutorial


I'm guest artist for the year-long project this week, so if you're interested in this tutorial, visit Life Documented 2018 HERE or the Facebook page HERE.


♥♥♥  Anna  ♥♥♥


Wednesday, July 12, 2017

Black Grungy Art Video Tutorial

Hello all! 

I'm back for a bit here, linking you to a video tutorial I made for Roben-Marie Smith's design team. It's my first project as design team member, and I'm very excited about it! 

Watch me how I use black cardstock to make the pages, create cute pockets for each signature, decorate the Art Pop cards for tags, create the cover and stitch the pages together and more. 

It'll be fun! (And not hard!) 

Check it out here: Roben-Marie Smith's Blog


Lots of happy metallic thread peeking out!


Luscious yarn for the tags.


If you make your own, I'd love to see them on Instagram! Tag it with #blackgrungyartjournal

Have a great day!

♥♥♥  Anna  ♥♥♥

Wednesday, August 3, 2016

Join me at Creative Team Tuesday on StencilGirl Talk

Hi, all! I am a day late, but I am on the StencilGirl Talk blog with a new project using brayers and stencils. So fun! 

Backgrounds galore.


Four time-lapse videos of me creating this purple and blue set, start to finish. :)


Steps on how I used stencils to create cards that fit in a little box.


To see my process and to learn what I am using these cards for, visit


Thanks for visiting! 

♥♥♥  Anna  ♥♥♥

Friday, August 15, 2014

My handmade Journal for DLP


Some of you have been asking how I made my DLP journal. Here goes:

I used Canson 15x11" 140lb watercolor paper, with each sheet folded in half.

To prepare my journal for binding, I used this method: How to Make a Sketchbook: Coptic Stitch.

To bind all the pages, I plan on doing this: Coptic Stitch Binding Tutorial

The only reason I haven't bound it yet is because I haven't taken the time! In hindsight, this is better for working in, because even though the Coptic Stitch binding method gives me a lay-flat binding, I won't have to wrestle with trying to have a flat surface to work on. As the book gets thicker and thicker, the more I'd get frustrated with an uneven surface. To work on my pages, I just grab one month at a time. I do wish every now and then that my book was all intact, especially to carry it around and when people want to see it. :)

My daughter and I made a video where I page through my pages, showing each signature and some more little details. Nothing grand or professional looking about the video, but it'll give you an idea of my set up. :P At about 1:20, I show the folded pieces of watercolor pages.


My bubbles page:


Supplies:
Watercolor paper
Neocolor II water-soluble wax crayons
Black marker, fine-tipped (I used Sharpie)
White paint pen (I used Painters)

Directions:

1. With the wax crayons, randomly color different circles, pressing hard, and then softly coloring in the middles. Cover the whole page with multiple colors, not paying too much attention to placement, as long as you don't leave huge gaps in between circles.

2. Wet brush, dissolve the color in the circles, focusing on allowing water to pool to one side of each circle. Try to collect the color in the same spots of each circle. Let brush touch the dark outlined part of each circle to bring in lots of vivid color into the circle. Let dry THOROUGHLY.

3. Outline each circle with the black marker, attempting to not touch the actual circle. Doodle another circle around the first one, being careful to not overlap the other circles. So some circled outlines will be behind others, depending how close the circles are to each other. Do it randomly, in no particular order. I started at the bottom, and kind of moved to the top, to the edge, but really no particular order. Important that you keep it random.

4. Color in the little gaps with black.

5. Add dots to each circle with the white paint pen, ensuring you add the dots to the same side of each circle. I painted them all on the right side, but it doesn't matter which side you choose, as long as they are consistently on one side. See photo. Let dry.

And you're done! Easy peasy, just a little time consuming, right?

:)

Haha, looking at the close-up, I noticed I missed a few areas with the white paint pen. Perfectionism kills creativity, I will just say. ;P

Let me know if I missed any details, and I love questions!
Thanks for visiting! Happy day to you!

Anna

Wednesday, August 6, 2014

A little video of how I create my DLP art journal

Some of you have been asking for a video of my process with creating my DLP journal. Here's a little bitty video I posted using Instagram. Lots to learn about video and editing before I post a longer one. LOL  


I'm working on my August pages. As you can see, my rounded squares are not perfect at all. :) See previous post of how I made my stencil.

Thanks for looking. Have a great day!

Anna


Saturday, July 12, 2014

Watercolored Squares Calendar

Hello blogland! 

Some of you have been asking me how I make my stencils for my month-at-a-glance pages in my Documented Life Project journal. For the tutorial, scroll down to the bottom of this post for the link.


A close-up of my January page, the first one I made. 


This is the June layout. Might add more details yet to this one.


Lots of doodles on my Match page. My favorite is the flower on the far right side. :)

My main inspiration for these doodles come from Tangle Patterns and Helen William's blog A Little Lime

For a tutorial on how to make your own stencils for this calendar, go to Emily Galore's website here.

 To download my pattern I used for the stencil, go to this older post of mine here. A note: you will want to adjust the size of the template so it fits your planner. I made it slightly too large for my 15x11 page spread. Let me know if you need help with that. Love to help you out! :)

Enjoy!

Anna