Showing posts with label StencilClub. Show all posts

Saturday, October 28, 2017

Mail Art Play


Hello peeps! Thanks for coming to visit me here. In the past month I've been having loads of fun fulfilling some happy mail requests and some surprises as well. Here is a little summary. Enjoy! 

Mail Art 01


For Roben-Marie Smith's design team, I made a tutorial for some fun happy mail pockets with a 5x7 gelatin plate, and with yummy rubber stamps by Kristin Peterson called Dream Thicket and the Shine set by Samie Harding 

Happy Mail Art Pockets video tutorial HERE


The contents of these pockets are prints from a gelliprinting session, seen below: 


Also, I've been decorating the white cardboard envelopes my StencilGirl club stencils come in. I've had such juicy fun decorating them that it's a shame they're not canvases!

Mail Art 02


Luscious plaid lines, mini hearts, dots and roses!


The whirly mandalas are so happy looking too. Lots of layers with the super matte chalk acylics by PaperArtsy, paired with the luminous Golden fluid paints. I think it's a perfect match!


Lately, I've enjoyed brayering on coloured backgrounds, instead of using a brush or sponge.
These pinks and purples swatches of colour are the result of my printmaking session for the art video tutorial, mentioned above. I really wouldn't need to add anything else to this luciousness, correct? But, I couldn't stop there, had to add my own marks and more to it!


Misty circles made with diy circle stencils add some more magic...

Mail Art 03


Mail Art 04


Just adore the script rubber stamp from the Shine stamp set! It adds the perfect ''looseness'' to my look. I actually managed to make two similar tags like this.


Now this l'il pocket I made waaaay back in 2015. I did make a tutorial for these pockets. See HERE. I hope to make a video tutorial for them one of these days. It's on my to-do list. 


Making more and more of these little painty index card files, with the added bonus of Art Pops stickers by Roben-Marie!

Mail Art 05


Several things are already tucked away in that book paper envelope. This time I added some streaks of smooshed colour. ♥


Loving this corner...


Wax seals make everything extra special!


Can't resist some glamour shots of the sewn edges on the envelopes! I find the Art Pops sticker in bottom middle-ish (in photo above) soooo gorgeous.


Well, here is the end of my post, I guess. I posted on my Instagram that I'd love to sell some of this type of mail art to you! For a decorated envelope, a wax sealed book paper envelope inside, a few tags and pockets, possibly some of my own stickers I've printed on my printer, and more, I'm asking $30.00 CDN + shipping. Shoot me an email at customscrapbooksbyanna@gmail.com if you're interested! ♥♥♥

Have a great day!

♥♥♥ Anna  ♥♥♥

Monday, January 2, 2017

Pastel Christmas unPlanner Pages

A new year HELLO to all of you!

A new year means the end of a year-long project. It is hard to say goodbye to DLP. I have now participated for three years, and it'll take some adjustment in my brain space to not have these art prompts. I am not quite sure what I'll be creating in 2017 yet.

Meanwhile, here is probably the last post for my unPlanner! 
To know more about how you could make an unPlanner, see the project challenge and artists HERE.

I chose a pastel Christmas theme, with pinks, purples and blues, using PaperArtsy fresco chalk acrylic paints. They are like icing on a cake!


For my divider, I painted a Bethlehem scene with NeoColor2 crayons and the fresco chalk paints. In the circle, I wrote out the Christmas story from Luke 2. The scene was inspired by a children's book illustration. The "stars" were made using stencils:


and one of Mary Beth Shaw's new planner stencils, 


My watercoloured doodled calendar got a colour treatment too, with some stamping and simple journaling. Whew! Only 3 days in all December was spent by ourselves! But it was good, very good. :)

I have the monthly view calendar available as a printable if you're interested in using it in your own planners. See HERE. 


I played for hours on my December, and I just want it finished now, so I left some parts simpler. 


I made a scalloped pocket to house the PACs by using a scallop punch and stenciling with the same circular stencil as used for the "stars" on my divider. The background is similar to the page on the right in my Dec 4-10 weekly view photo above.  The ''be strong and courageous'' phrase echoes my 2016 OLW: Strength. See my January post to see how I documented it in the beginning: 


I procrastinated with the art challenges this month, but sure had fun when the ideas finally flowed.

The one above is actually the prompt for November, but decided to include it in my December: use something from the bottom of your purse. I had wrapping from a Hershey Kisses candy, so I made little "beads" from the foil wrapper to attach to the ribbon, and used the little paper slip that comes with each candy. I like it!


For this one above, the prompt was to use crayon, so like many of you in the fb group, I used Inktense pencils, sopping up the pooling colour with a silk ribbon before it dried, dying it and making the colours look pastel instead of the vivid look you get by using water sparingly.

 I used the paper from the reinforcement stickers as a stencil on top of the watercolour wash background.

The phrase is one line from the Holy Sonnet XV by Donne. I was so struck by the words from the poem when it was beautifully recited during our church's Christmas Eve services, that I knew I needed to include it in my unPlanner somehow! The rest of the poem is printed on the back of the previous PAC. 


This PAC is for the very last prompt of the year: to use GOLD. Well, I was so pleased, as I was already using gold throughout December! I kept it simple using this beautiful stencil by Gwen LaFleur, called Decorative Curvy Ornamental Stencil. 


I was feeling nostalgic of this whole project, so I tried to use as many as the unPlanner kit downloads I could. See the days of the weeks at bottom of page? Those are from the weekly view ones. :) 


I sewed a page protector to the backside of the List 10 to house my double-sided tag.


The "crown" trim is made using an old EK Success punch. 


More candy wrapper "beads".
The ribbon, I sent through my sewing machine and made it ruffly and messy. :)


Flower stencil fun with the November 2016 StencilGirl club stencils by Mary Beth Shaw. LOVE LOVE it.

"This stuff" is from the unPlanner kit download kit. 

And there it is. The end of 2016. It's been so fun and rewarding. Loved connecting with like-minded creatives on the Facebook Group and on Instagram.

 What next? I did sign up for Inspiration Wednesday 2017, so you should see posts about that in the future.

Thanks so much everyone for your encouraging words the whole year long! I will miss this!

♥♥♥  Anna  ♥♥♥


Thursday, November 24, 2016

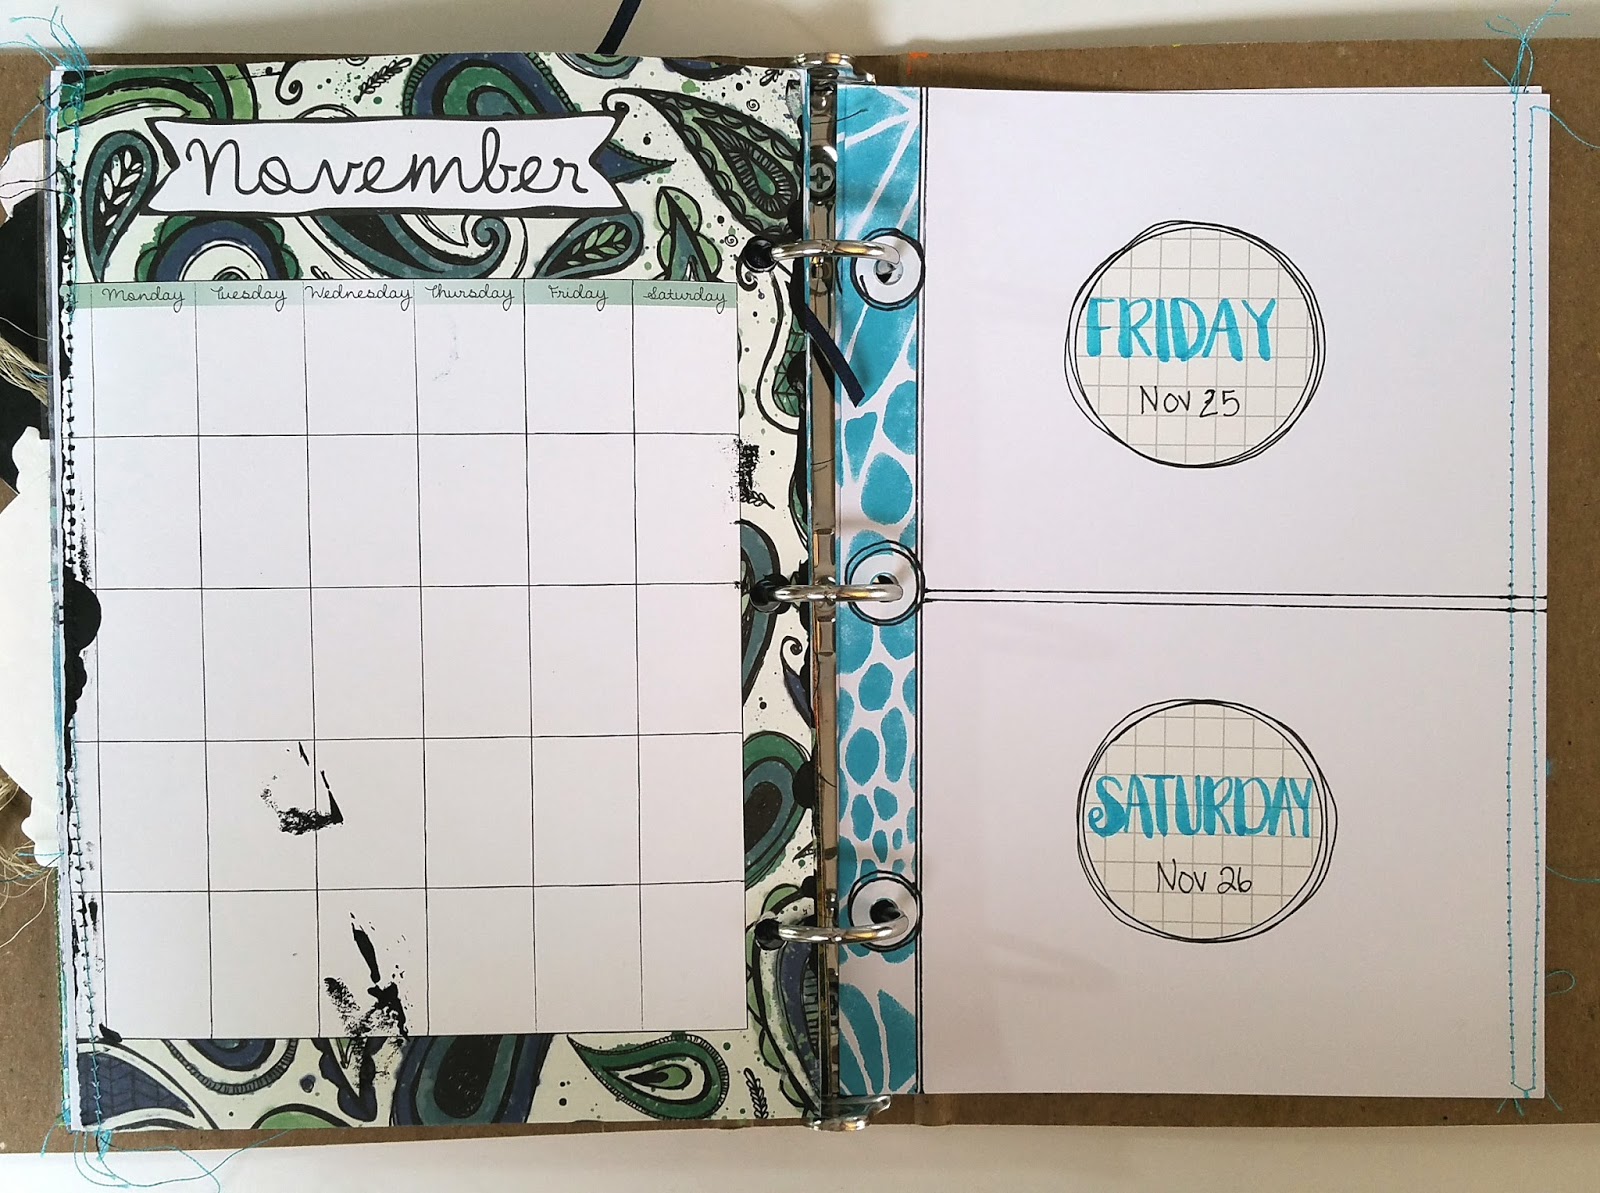
November in my unPlanner Part 01

Hello all

I have had some fun in my unPlanner again with a new colour palette: blues, greys, whites, blacks. We have full-fledged winter temps and snows up here in Canada, and I feel that suits my journal. :)

To discover other unPlanner ideas and see the project challenges and themes, sign up for The Documented Life Project 2016- The unPlanner at the Art to the 5th Academy or see the blog HERE.

The first part I've done is make the divider, and below is a photo of it open. 


This was my project for my StencilGirl Creative Team post over at the StencilGirl blog. To see my step-out tutorial, check it out HERE.


I enjoy the depth of this piece, using blue-black and varying shade of grey. 

If I had to sum up one thing I've learned from art journaling this year, it would be this: create depth with varying shades of colour!


Photo below, page on left, is a page from the unPlanner kit. The photo after this one, you see the other side of that page completely covered with black paint. I will do the same here. Page on right is my prepared pages for the rest of the month, where I journal daily.


A process pic of decorating the pre-made pocket page. Of course, StencilGirl stencils were used. ;) The "ladder" at the top part is a club stencil by MaryBeth. See it HERE. The "snowman" is from a stencil with three varied sized ovals. See the stencil HERE. The other stencils used are THIS and THIS 6x6 stencil.


I circled the part below to show you which part of the large stencil I used. :) More photos to come in my next blog post when I have the pocket pages complete. That's my plan, anyway.

Photo below is one of the items in that pocket. I painted a tag white, then glued photos to it. 


I discovered a fun app called Prisma, and spent too many hours playing with it! It transforms photos into different styles of art with filters. My favourite filter is the Wave and Candy. I discovered it from Miranda, through her weekly project called the 18/52 Art Journal Project

Scroll to bottom of post to see two more photos of my unPlanner.
The second photo on the tag is of my son and his silver velour cape.

Here are some more photos I tweaked. :) I might include a few of these in my unPlanner as well.

Before, of our tree in our front yard:


After, using the Wave filter:


Candy filter


Before:


After, with the Wave filter again.


Before, our shortcut through the trees to the mailboxes.


After


Before, some of the roses in my garden:


Before, photo of the brayered backgrounds I used for my August unPlanner pages:


After:


This last one is giving me ideas of painting backgrounds! Need to try!

Spent a good half hour driving around in the country yesterday, taking photos of the beautiful scenery around us. 


This altered version reminds me of some famous painter...but I can't remember who!


Well, it was fun to share what is happening in my unPlanner! I'm looking forward to making the PACs and the fun List10 this month. Hope I inspired you to work in your unPlanner or other artjournals!

♥♥♥  Anna  ♥♥♥