Showing posts with label StencilGirldesignteam. Show all posts

Thursday, April 20, 2017

StencilGirl and Amazing Casting Products Blog Hop


A friendly hello to all of you! 

I'm participating in a fantastically fun blog hop with StencilGirl and Amazing Casting Products! See below to see what I made and how you can win goodies!


Never heard of Amazing Casting Products? Well...I didn't know much either, and so when I set out to create something of the goodies I received in the mail, I went on an adventure to learn what it is! So many stunning ways out there to tickle your creative bone, and the eye candy, wow!

So, I received Molding Putty, see HERE
and
Alumilite White Resin, see HERE.

I thought of making jewelry, which is a popular thing to make with casting products, but I have very little experience with that, so I stuck with what I am familiar with: 3D embellishments.

The first thing I did was start playing with the molding putty, looking for things in my house that would create an interesting mold. I found success with a necklace. See below.


It was a little tricky prying out the finely detailed parts, and I ended up tearing a bit of the mold. Take it really slow when you pull out the original piece.


I had to patch the underside, as I pressed the original into the putty too hard, piercing the putty through.


The instructions come with the packaging, and the steps are very simple. So pictured above: I poured the resin into the mold. In 20 minutes, it is ready to be taken out. Fast results, people, making this ideal for those of you who don't want to wait a day to see. :)


I cut up the piece into smaller bits. The resin is quite flexible while it is warm. It cuts great when it is thoroughly cooled down, as long as you haven't made the it too thick.
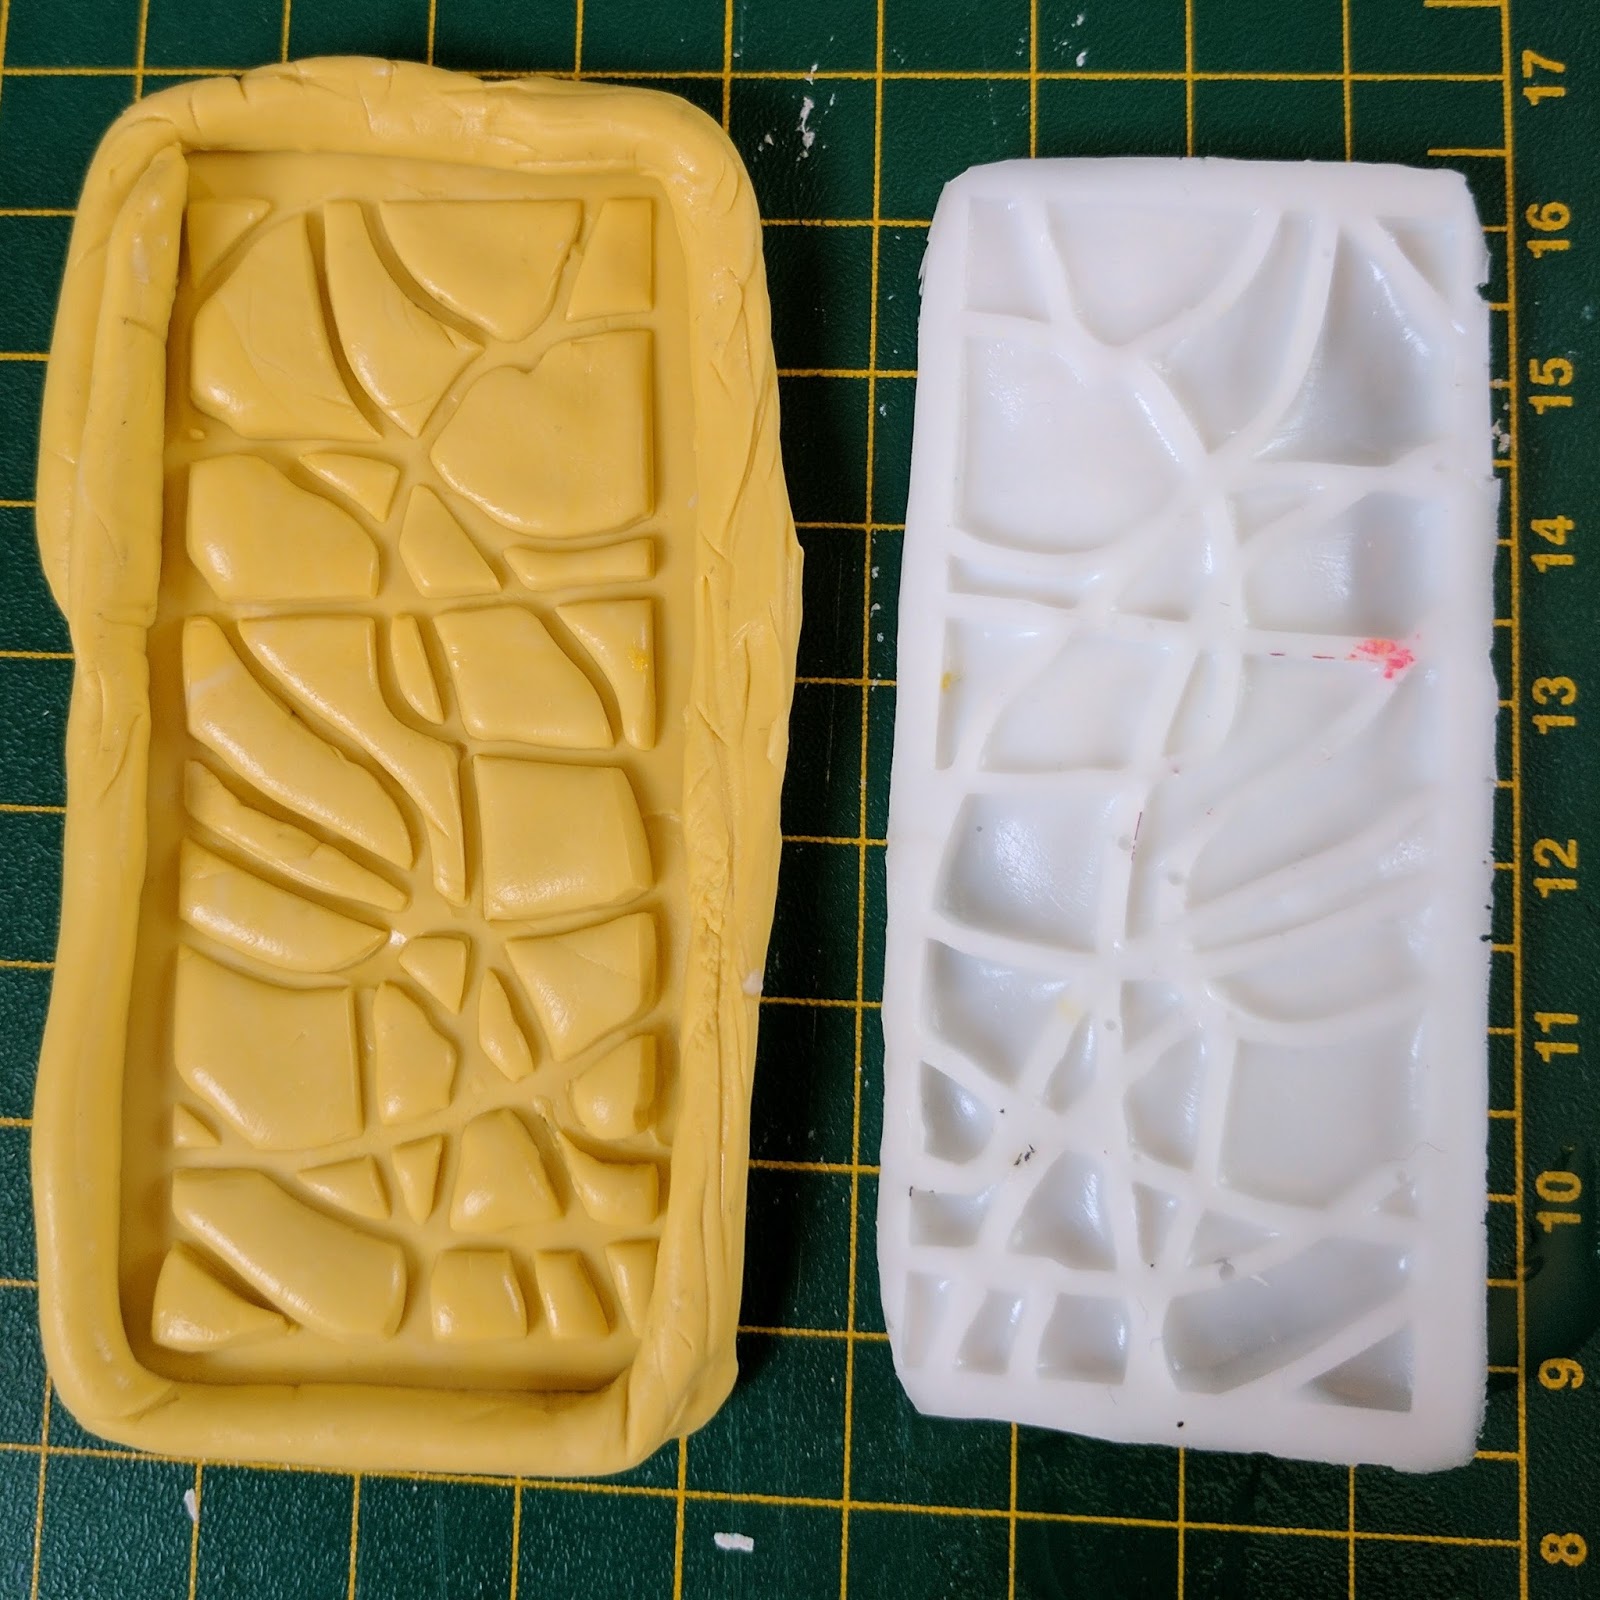

Then I tried different stencils, and loving the results of this one, so I made several of them. I used one of the rectangular shapes from the April 2016 Private Collection 16.2


Painted the piece with black chalkboard paint, let it dry, then added a few layers of a pink from the Silks line by ColorArte. Love the sheen it gives!


I seared a hole for the ribbon with my woodburning tool. Works like a charm.


I made a few casts from this mold, trying different looks. 


Now on to my art journal page! I had previously painted the background of this page in my junque journal that houses the Art Marks 20 Day Challenge

I tried to transfer some laser-printed images to my page, but didn't have much success, so I just glued the photos to the page with matte medium. They've got that grunge look to them from trying to transfer them, so I'll go with that! ;)


With the Travel Note Mini, I add texture to some of the coloured areas of the two page layout.


I add some detail with a fun circular-shaped stencil from the Cathy Nichols Boho Collection.


I really want this looking even more grungy, so I splatter some ink and make it run down and across the page.


Add in black spots with another little stencil from the April 2016 Private Collection 16.2. 


Circled black spots with black pen, and added paint to the resin chevron pieces. 

One of the pieces, I painted with black chalk paint, and then the metallic Silks on top, which gives it some bling. ♥ 

Glued resin pieces to page with a hot glue gun. I also glued the ribbon in place and a silver metal leaf from a discarded necklace.


"Be Intentional" is my phrase for 2017.

I dyed the silk ribbon with Dylusions sprays.

And there it is! A completely new way for me to add decoration to my art journaling pages: 3D resin. I am now addicted! 


Thanks for stopping by, fellow creatives! I've had a lot of fun with creating my own resin casts. Stencils are a such an easy way to add textures and patterns YOUR way to your art!

See below for info on how to win these products and to see how other my fellow StencilGirl Creative Team members and other artists use these products together!

♥♥♥  Anna  ♥♥♥


GIVEAWAY

One lucky winner will receive both a $25 Gift Certificate to StencilGirl Products
AND a $25 Gift Certificate to Amazing Casting Products!

Visit the fabulous designers from both teams and comment for your
chance to win!
The more blogs you comment on, the more chances you have to WIN!
(One comment per blog please.)
You have until Sunday, April 23rd at 11:59PM Central Time to leave your comments.
Winner will be announced on
StencilGirl's Facebook page and Amazing Casting Products’s Facebook page
on Monday, April 24th.

Tuesday, April 4, 2017

Canvas Corp Match-up! Stencils and Burlap


This month StencilGirl Products is collaborating with Canvas Corp Brands to show you unique ways to use StencilGirl stencils with a variety of Canvas Corp Brands surfaces and Tattered Angels Paint Kits!

Be sure to check out the details at the end of this post on how you can
win a wonderful prize package worth over $50 in goodies from
StencilGirl Products and Canvas Corp Brands!


For this Match-up, I received a beautiful kit to work with. So many things I can make! I decided on using the journal, the canvas envelope (in which the papers fit in perfectly), the Tattered Angels four spray paint colours - the Bouquet kit (which are permanent once dry), the brown burplap piece, the kraft tags, a bit of the patterned paper and some of the waxed cotton cord and trim.

Paired with my favourite stencils by StencilGirl, and I had a blast creating!

I decorated the envelope and tags and sewed them to the cover of the naked kraft journal. Love the look!


I used two of the stencils from the August 2013 club stencils by MaryBeth Shaw, spraying the colour through the stencils with the Tattered Angels spray paint, then outlined each round shape with Tulip fabric markers. I added white dots with a white paint pen on the red shapes.


I pulled out the horizontal burlap pieces to create a "fringe", and then sewed the burlap to the inside edge of the "V" in the canvas envelope.


For the tag decoration, I used the circular shaped stencil with the criss-cross in the middle. It's from the April 2016 Club Stencils set. I have used this particular stencil repeatedly since I've received it. It just makes me happy somehow. :) I punched out flowers from the patterned paper.


I sewed the tags to the inside of the cover, and thread the trim and cord through.


And there it is: a new journal for my artsy pleasure! 

♥♥♥  Anna  ♥♥♥

What would a matchup be without a fun prize!!!!
Here’s your chance to get your hands on a products from StencilGirl Products and Canvas Corp Brands.
All you need to do is….


  • leave a comment here on any or all of the Matchup Posts during the month of April with StencilGirl Products and CCB.
    You can leave one on each post for more chances to win. Don’t forget to include the hashtag #SGPCCBmatchup so we can find you!!!
  • and/or leave a comment on the CCB Facebook page or StencilGirl Products Facebook page. Don’t forget to include #SGPCCBmatchup so we can find you!!!
  • and/or leave a comment on any of the CCB Instagram posts or StencilGirl Products Instagram posts where you see any of the projects from the CCB team or the SGP team.
    Don’t forget to include #SGPCCBmatchup so we can find you!!!
  • You can follow along by searching #SGPCCBmatchup. If you love what you see and would like to join the Facebook group CCB Collective – ask to join today.
  • You can find all StencilGirl Products in our shop – www.stencilgirlproducts.com
  • Shop Canvas Corp Brands at https://shop.canvascorpbrands.com 
  • We will be sharing projects the entire month of April – learn new techniques, see how new products are used and be inspired with great ideas from members of the SGP and CCB creative teams.

Monday, January 16, 2017

Otherworldly Mixed Media Art

Hi, lovelies! 

I'm on the StencilGirlTalk blog today, sharing a step-out on how to make this project my daughter has titled Otherworldly.
Check it out here:


You can also come join me and others in a fun challenge: The Mixed Media Monthly Challenge #32 to win a $25 gift certificate to StencilGirl products!


Have a great day!

♥♥♥  Anna  ♥♥♥

Thursday, October 27, 2016

Layered Sunshine with Stencils in my unPlanner

Hi, all! 

I'm on Thursday Throwback on the StencilGirl blog today, along with three others of the creative team. Come see what we're all up to! :)

Throwback Thursday is about taking older stencils, and creating new things with it. :) 

My project of course, is my unPlanner, specifically the monthly calendar I make. 

Don't know what the unPlanner project is about? Check it out here:


Scroll down to see my step-out.


I shared my calendar in my previous post, and I mentioned that I didn't like the way it looked, so I've made changes now.

So here is the before:


And after:


I had used the Shattered stencil to create those orange rays over splattered ink, but I felt like it needed more.

I start by taking the Mandala #3 stencil and white paint, stenciling in "rays".


Then I go in with the calligraphy pen and "doodle" with black India ink.


Next, I take a little stencil with little semicircle shapes and stencil in the white areas with purple paint.


The Mini Diagonalz stencil comes next where I again, use white and tuck each diamond between the purple parts. (I masked off the whole area of the stencil so only the diamond is shown.)

I didn't like my lettering on the circle middle, so I took out my daughter's calligraphy pen and India ink. It takes practice to get a steady hand, but I am okay with it in the end. I wrote the lettering on a punched out circle of white cardstock and glued it into the center.

Lastly, with black India ink and calligraphy pen, I create lines of black dots to create more the look of sun rays.


I've been using reinforcements a lot on every page with my unPlanner, and this time I felt the rest of the calendar needed some lift, so these circles "spray" out. I like the sense of movement they create.


Finished! To see more of my unPlanner, go to my older posts, or click 


To see what this unPlanner project is about, visit the Art to the 5th Academy.

Thanks so much for the visit!
Until next time!

♥♥♥  Anna  ♥♥♥