Showing posts with label aubergine. Show all posts

Thursday, April 20, 2017

StencilGirl and Amazing Casting Products Blog Hop


A friendly hello to all of you! 

I'm participating in a fantastically fun blog hop with StencilGirl and Amazing Casting Products! See below to see what I made and how you can win goodies!


Never heard of Amazing Casting Products? Well...I didn't know much either, and so when I set out to create something of the goodies I received in the mail, I went on an adventure to learn what it is! So many stunning ways out there to tickle your creative bone, and the eye candy, wow!

So, I received Molding Putty, see HERE
and
Alumilite White Resin, see HERE.

I thought of making jewelry, which is a popular thing to make with casting products, but I have very little experience with that, so I stuck with what I am familiar with: 3D embellishments.

The first thing I did was start playing with the molding putty, looking for things in my house that would create an interesting mold. I found success with a necklace. See below.


It was a little tricky prying out the finely detailed parts, and I ended up tearing a bit of the mold. Take it really slow when you pull out the original piece.


I had to patch the underside, as I pressed the original into the putty too hard, piercing the putty through.


The instructions come with the packaging, and the steps are very simple. So pictured above: I poured the resin into the mold. In 20 minutes, it is ready to be taken out. Fast results, people, making this ideal for those of you who don't want to wait a day to see. :)


I cut up the piece into smaller bits. The resin is quite flexible while it is warm. It cuts great when it is thoroughly cooled down, as long as you haven't made the it too thick.
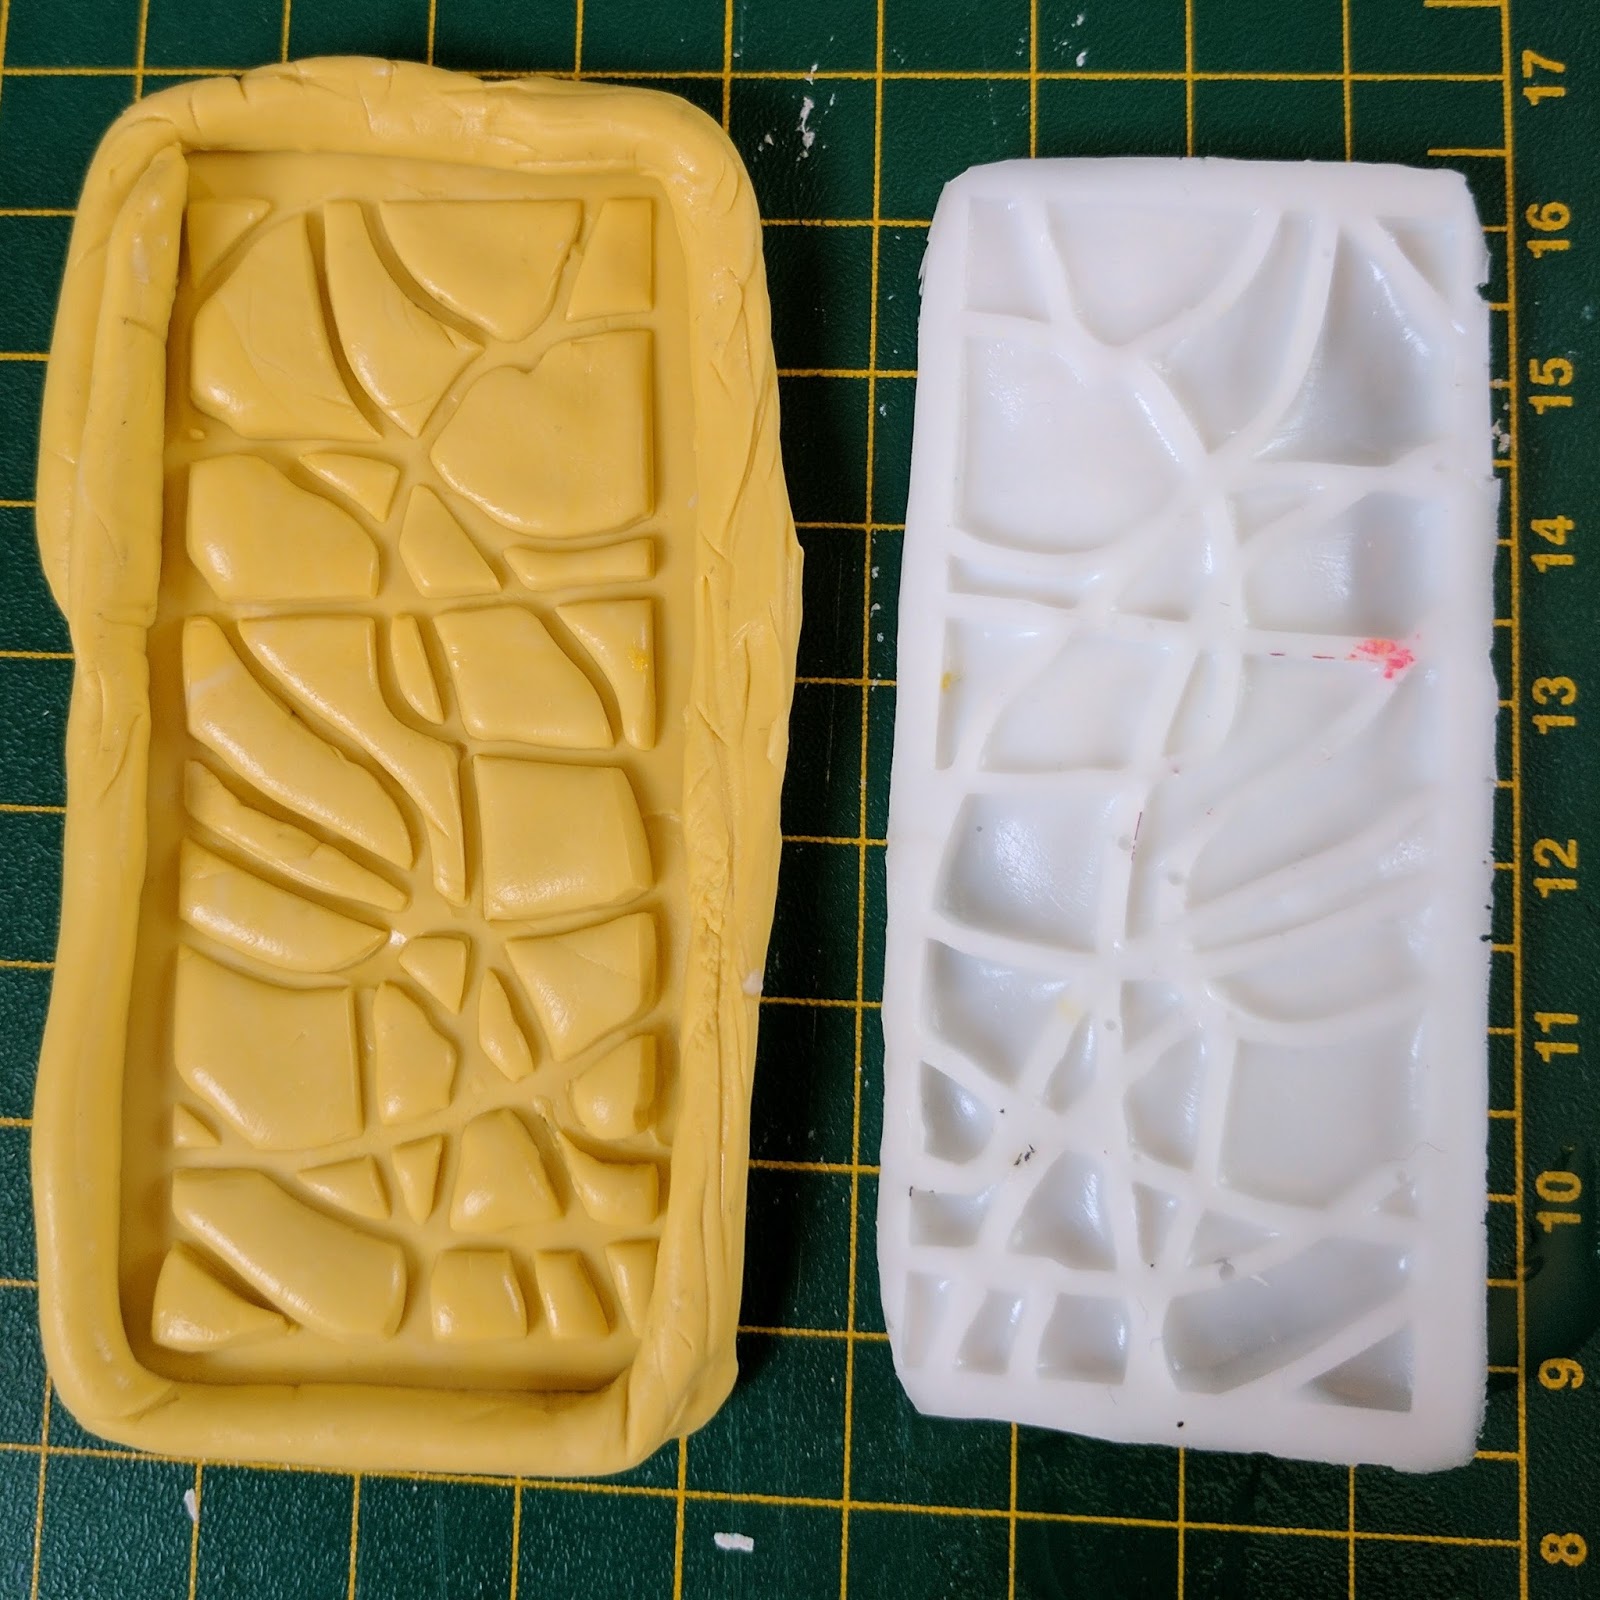

Then I tried different stencils, and loving the results of this one, so I made several of them. I used one of the rectangular shapes from the April 2016 Private Collection 16.2


Painted the piece with black chalkboard paint, let it dry, then added a few layers of a pink from the Silks line by ColorArte. Love the sheen it gives!


I seared a hole for the ribbon with my woodburning tool. Works like a charm.


I made a few casts from this mold, trying different looks. 


Now on to my art journal page! I had previously painted the background of this page in my junque journal that houses the Art Marks 20 Day Challenge

I tried to transfer some laser-printed images to my page, but didn't have much success, so I just glued the photos to the page with matte medium. They've got that grunge look to them from trying to transfer them, so I'll go with that! ;)


With the Travel Note Mini, I add texture to some of the coloured areas of the two page layout.


I add some detail with a fun circular-shaped stencil from the Cathy Nichols Boho Collection.


I really want this looking even more grungy, so I splatter some ink and make it run down and across the page.


Add in black spots with another little stencil from the April 2016 Private Collection 16.2. 


Circled black spots with black pen, and added paint to the resin chevron pieces. 

One of the pieces, I painted with black chalk paint, and then the metallic Silks on top, which gives it some bling. ♥ 

Glued resin pieces to page with a hot glue gun. I also glued the ribbon in place and a silver metal leaf from a discarded necklace.


"Be Intentional" is my phrase for 2017.

I dyed the silk ribbon with Dylusions sprays.

And there it is! A completely new way for me to add decoration to my art journaling pages: 3D resin. I am now addicted! 


Thanks for stopping by, fellow creatives! I've had a lot of fun with creating my own resin casts. Stencils are a such an easy way to add textures and patterns YOUR way to your art!

See below for info on how to win these products and to see how other my fellow StencilGirl Creative Team members and other artists use these products together!

♥♥♥  Anna  ♥♥♥


GIVEAWAY

One lucky winner will receive both a $25 Gift Certificate to StencilGirl Products
AND a $25 Gift Certificate to Amazing Casting Products!

Visit the fabulous designers from both teams and comment for your
chance to win!
The more blogs you comment on, the more chances you have to WIN!
(One comment per blog please.)
You have until Sunday, April 23rd at 11:59PM Central Time to leave your comments.
Winner will be announced on
StencilGirl's Facebook page and Amazing Casting Products’s Facebook page
on Monday, April 24th.

Friday, March 11, 2016

Leaves, Mountains and a Hat in my 18/52 Project

 Hi, fellow creatives! I'm having fun playing along with the 18/52 Journal prompts. This is a free art journaling project hosted by the lovely Miranda Banks at Clare Plantation. Check it out here!  

You pick 18 supplies and create one page a week using only 18 items of your choosing for three months. After the three months are over, you select another 18, and use only those for another three months. You do this two more times, until you have 52 pages over the course of the whole year. So fun!

So I've completed eight of the prompts. Today I'm sharing number 6, 7 and 8. I blogged the first 5 early February. See that post HERE.

I'm still going strong with my "Aubergine" color series. Not tired of the colors yet!


Week 6 prompt was LEAVES. I was inspired by an illustration by Eloise Ranouf called Leaf Blocks.

I loaded up my round 6" Gelli Plate with paint in my color palette: deep violet, hot pink and black. I also added white gesso. Using the two stencils from my kit, I made several layers on a paper from my junque journal (an old Reader's Digest book). Then I doodled the leaves with the white Uniball Signo pen, cut them out in rounded rectangles and glued them onto a painterly background in my unPlanner. 


For Week 7, the prompt was MOUNTAINS. I was inspired by a woven rug I found on Pinterest. I adore all those colors mixed with each other, so I went to work finger painting. So fun. I painted many layers, waiting things to partially dry in between layers, but sometimes not, allowing the colors to blend. See the rug that gave me the idea HERE. I just used the paint and gesso for this page. These diamonds/squares on an angle/triangular peaks are what I call mountains. LOL I am allowed to use this prompt very loosely, I think. That's the beauty of art journaling prompts: I will not get tested or graded on how I do this. 


Here it is in my unPlanner.


Week 8, the Prompt was HAT. I was looking for a creative way to use this stencil.


It's this stencil, nicely "loaded" with the paint! I found the quote in the old Reader's Digest book I use as an art journal.

The stencil brought an image to mind of a lady with flowers piled high on her head, and lo, the quote! I happened upon it quite by accident, leafing through my old book! It goes perfectly!! Looking some more through the book, I found an image of a lady to use. She's sad. Must be the flowers weighing her down. I cut her out, and glued it to a page in my unPlanner. Next I placed down the stencil, using the palette knife to add the 3D Gel medium through the stencil, randomly adding the gel through the stencil in a "hat" shape. I let it dry, then started adding color. The flowers didn't look "flowery" enough, so I hand painted some flowers and leaves too. I added more details with the white gel pen, I kept on adding more paint to the background. Loving the textures!!

I blotted out a few words from the little quote with black paint, then adding the right wording with the gel pen.

And there she is!

Next three prompts I need to do are STAMP, FOREST and MOON. Maybe you'll see a post about them soon. :)

Thanks for visiting!

♥♥♥  Anna  ♥♥♥


Saturday, February 6, 2016

18/52 Journal Project Weeks 1-5

Hi, everyone! Just a quick blog post of my layouts for the fun 18/52 Journal project, Haven't heard of it? Check it out HERE!


These are the eighteen items I have chosen, and the challenge is to use only these supplies for 3 months, creating one piece a week. Miranda at Clare Plantation has prompts you can follow along with, or you can make your own. For some of mine, I have not used a prompt at all. See a previous blog post of mine to see my list and why I chose what I did HERE.

So, here's Week One: 


I chose to go with two paint colors: Deep Violet by Liquitex Basics and a Martha Stewart craft paint called Party Streamers, plus black and white gesso for my kit, so these are the colors you will see for the next three months. I adore this color scheme, so I hope not to get tired of it! :)

Miranda's first prompt was "wood", so I stamped some background areas with a wood stamp, handcarved by the lovely Miranda, which I purchased from her Etsy store. She has adorable stamps you can buy! 

I was deep into making these flowers, taught by the lovely Cindy Gilstrap in her Artsy Dori class, so I started with that. 

I added other fun paint marks and doodles, finishing with a rotating stamp with various numbers and symbols on it. I thought that might lend some interest to this eclectic look. :)

Week Two:


Second prompt was "meadow", so I attempted a very simple one, using only gesso, my pink paint, and the white Signo gel pen. Simplistic, but I got it done!

Week Three:


For Week three, the prompt was "geometric", and I thought, awesome! One of the stencils I chose is very geometric, so that is the star of this page. It's a great stencil that came in Stencil Girl's December Stencil Club by Mary Beth Shaw. See it HERE

I added varying shades of pink and purple using a sponge, and completed it all by doodle-ing (sp??) with white gel pen. I could have definitely spent more time blending and shading - creating more dimension, but I was impatient to go on to my next gazillionth project. Teehee!

Week Four:


This one I had great fun with. I decided to ditch the prompt (it was "queen") but nothing was coming up, I was getting behind, so I decided to just do my own thing. This is completely intuitive, with no plans on how it should look. I just fiddled with paints on my fingers, a bit of stencilling (using the December Stencil Club stencil that looks like abstract roses), and that's it. I love it, actually! So free. :)

Week Five: Blooms at Midnight


My favorite so far. The prompt was "gem", and I LOVE FLOWERS, they are the gem of my heart, so I decided to paint them. 

I had no plans really on how it all should look, but I started by covering up the two pages with black paint, adding in the deep violet to attempt that aubergine color I love so much. You can see the deep eggplant color on the right hand side, in the middle. 

I then painted with my fingers, a light shade of pink, painted in five random areas, then built up layer after layer, adding pink and purple, sometimes dark, sometimes bright, sometimes even white, mixing all together, eventually adding more detail. 
Next, I added some stencilling with that abstract rose stencil again, then some white dots, shaded the edges with bursts of color, and called it done. 

I will try more of this style!

To see how I added these pages to my unPlanner, go to this post. :)

There! My first month of the18/52 Journal project. I'm pleased. I am not tired of my supplies yet. Looking forward to using the Gelli plate in my stash, more of the stencils I chose, and the stamps. Yippeee! Thanks, Miranda, for thinking up this great project!! Love ya!

Have a blessed day!

♥♥♥ Anna ♥♥♥