Showing posts with label artsycalendar. Show all posts

Monday, January 2, 2017

Pastel Christmas unPlanner Pages

A new year HELLO to all of you!

A new year means the end of a year-long project. It is hard to say goodbye to DLP. I have now participated for three years, and it'll take some adjustment in my brain space to not have these art prompts. I am not quite sure what I'll be creating in 2017 yet.

Meanwhile, here is probably the last post for my unPlanner! 
To know more about how you could make an unPlanner, see the project challenge and artists HERE.

I chose a pastel Christmas theme, with pinks, purples and blues, using PaperArtsy fresco chalk acrylic paints. They are like icing on a cake!


For my divider, I painted a Bethlehem scene with NeoColor2 crayons and the fresco chalk paints. In the circle, I wrote out the Christmas story from Luke 2. The scene was inspired by a children's book illustration. The "stars" were made using stencils:


and one of Mary Beth Shaw's new planner stencils, 


My watercoloured doodled calendar got a colour treatment too, with some stamping and simple journaling. Whew! Only 3 days in all December was spent by ourselves! But it was good, very good. :)

I have the monthly view calendar available as a printable if you're interested in using it in your own planners. See HERE. 


I played for hours on my December, and I just want it finished now, so I left some parts simpler. 


I made a scalloped pocket to house the PACs by using a scallop punch and stenciling with the same circular stencil as used for the "stars" on my divider. The background is similar to the page on the right in my Dec 4-10 weekly view photo above.  The ''be strong and courageous'' phrase echoes my 2016 OLW: Strength. See my January post to see how I documented it in the beginning: 


I procrastinated with the art challenges this month, but sure had fun when the ideas finally flowed.

The one above is actually the prompt for November, but decided to include it in my December: use something from the bottom of your purse. I had wrapping from a Hershey Kisses candy, so I made little "beads" from the foil wrapper to attach to the ribbon, and used the little paper slip that comes with each candy. I like it!


For this one above, the prompt was to use crayon, so like many of you in the fb group, I used Inktense pencils, sopping up the pooling colour with a silk ribbon before it dried, dying it and making the colours look pastel instead of the vivid look you get by using water sparingly.

 I used the paper from the reinforcement stickers as a stencil on top of the watercolour wash background.

The phrase is one line from the Holy Sonnet XV by Donne. I was so struck by the words from the poem when it was beautifully recited during our church's Christmas Eve services, that I knew I needed to include it in my unPlanner somehow! The rest of the poem is printed on the back of the previous PAC. 


This PAC is for the very last prompt of the year: to use GOLD. Well, I was so pleased, as I was already using gold throughout December! I kept it simple using this beautiful stencil by Gwen LaFleur, called Decorative Curvy Ornamental Stencil. 


I was feeling nostalgic of this whole project, so I tried to use as many as the unPlanner kit downloads I could. See the days of the weeks at bottom of page? Those are from the weekly view ones. :) 


I sewed a page protector to the backside of the List 10 to house my double-sided tag.


The "crown" trim is made using an old EK Success punch. 


More candy wrapper "beads".
The ribbon, I sent through my sewing machine and made it ruffly and messy. :)


Flower stencil fun with the November 2016 StencilGirl club stencils by Mary Beth Shaw. LOVE LOVE it.

"This stuff" is from the unPlanner kit download kit. 

And there it is. The end of 2016. It's been so fun and rewarding. Loved connecting with like-minded creatives on the Facebook Group and on Instagram.

 What next? I did sign up for Inspiration Wednesday 2017, so you should see posts about that in the future.

Thanks so much everyone for your encouraging words the whole year long! I will miss this!

♥♥♥  Anna  ♥♥♥


Thursday, October 27, 2016

Layered Sunshine with Stencils in my unPlanner

Hi, all! 

I'm on Thursday Throwback on the StencilGirl blog today, along with three others of the creative team. Come see what we're all up to! :)

Throwback Thursday is about taking older stencils, and creating new things with it. :) 

My project of course, is my unPlanner, specifically the monthly calendar I make. 

Don't know what the unPlanner project is about? Check it out here:


Scroll down to see my step-out.


I shared my calendar in my previous post, and I mentioned that I didn't like the way it looked, so I've made changes now.

So here is the before:


And after:


I had used the Shattered stencil to create those orange rays over splattered ink, but I felt like it needed more.

I start by taking the Mandala #3 stencil and white paint, stenciling in "rays".


Then I go in with the calligraphy pen and "doodle" with black India ink.


Next, I take a little stencil with little semicircle shapes and stencil in the white areas with purple paint.


The Mini Diagonalz stencil comes next where I again, use white and tuck each diamond between the purple parts. (I masked off the whole area of the stencil so only the diamond is shown.)

I didn't like my lettering on the circle middle, so I took out my daughter's calligraphy pen and India ink. It takes practice to get a steady hand, but I am okay with it in the end. I wrote the lettering on a punched out circle of white cardstock and glued it into the center.

Lastly, with black India ink and calligraphy pen, I create lines of black dots to create more the look of sun rays.


I've been using reinforcements a lot on every page with my unPlanner, and this time I felt the rest of the calendar needed some lift, so these circles "spray" out. I like the sense of movement they create.


Finished! To see more of my unPlanner, go to my older posts, or click 


To see what this unPlanner project is about, visit the Art to the 5th Academy.

Thanks so much for the visit!
Until next time!

♥♥♥  Anna  ♥♥♥

Saturday, January 24, 2015

Gelatos and White Sand Art Journal Page


January Theme
The Blank Page and How to Face It!
January 17
Art Challenge: The Color Wheel
Journal Prompt: 
"I found I could say things in color with shapes that I couldn't say any other way..." - Georgia O'Keeffe


The journaling prompt for week 3 really resonated with me. I have thought about it all week long. :) I speak jibberish often. I speak fast, I stumble over words, I stutter, I mumble. It's hard to explain sometimes how I feel. I am a very passionate, emotional person, and since the people closest to me can only stand so much of me, LOL art journaling is way of letting things flow from my heart. I couldn't even say how it works or why my heart seeks out color and shapes and why I feel such a need to create, but it's very important to me.


This week was really busy, and hadn't really planned on stopping where I did, but I think I am calling this journal page done. Who knows, I might add something another day, but I happy with it for now. :)

My date numbers are looking too cool colored compared to the rest of the colors, but it must be the lighting and my lack of photography skills, as in real life, I didn't notice that they clashed a bit. ;)


 This spread is important to me, as I wasn't concerned about the outcome. I just wanted to play with my supplies. I wanted to create different textures. I used a Finnabair Texture Paste - white sand,  from her Art Extravagance line.


I hadn't used my Gelatos much yet. The colors I used here came in a set. First I gessoed the background. Then I simply colored in circles witht the Gelatos quickly and randomly over the page, not over-thinking it. Then I added modeling paste to the circles in areas with my fingers, and then the texure paste in between where no color had landed yet, making sure each layer was completely dry.


 And that's it! I'm done!
Thanks for stopping by!


Friday, January 16, 2015

Week 2 of DLP 2015 Art Journal

Week 2 of The Documented Life Project 2015 - The Journal

If you're not familiar with this project, go HERE to learn more.
January Theme
The Blank Page and How to Face It!
January 10
Art Challenge:  Gesso
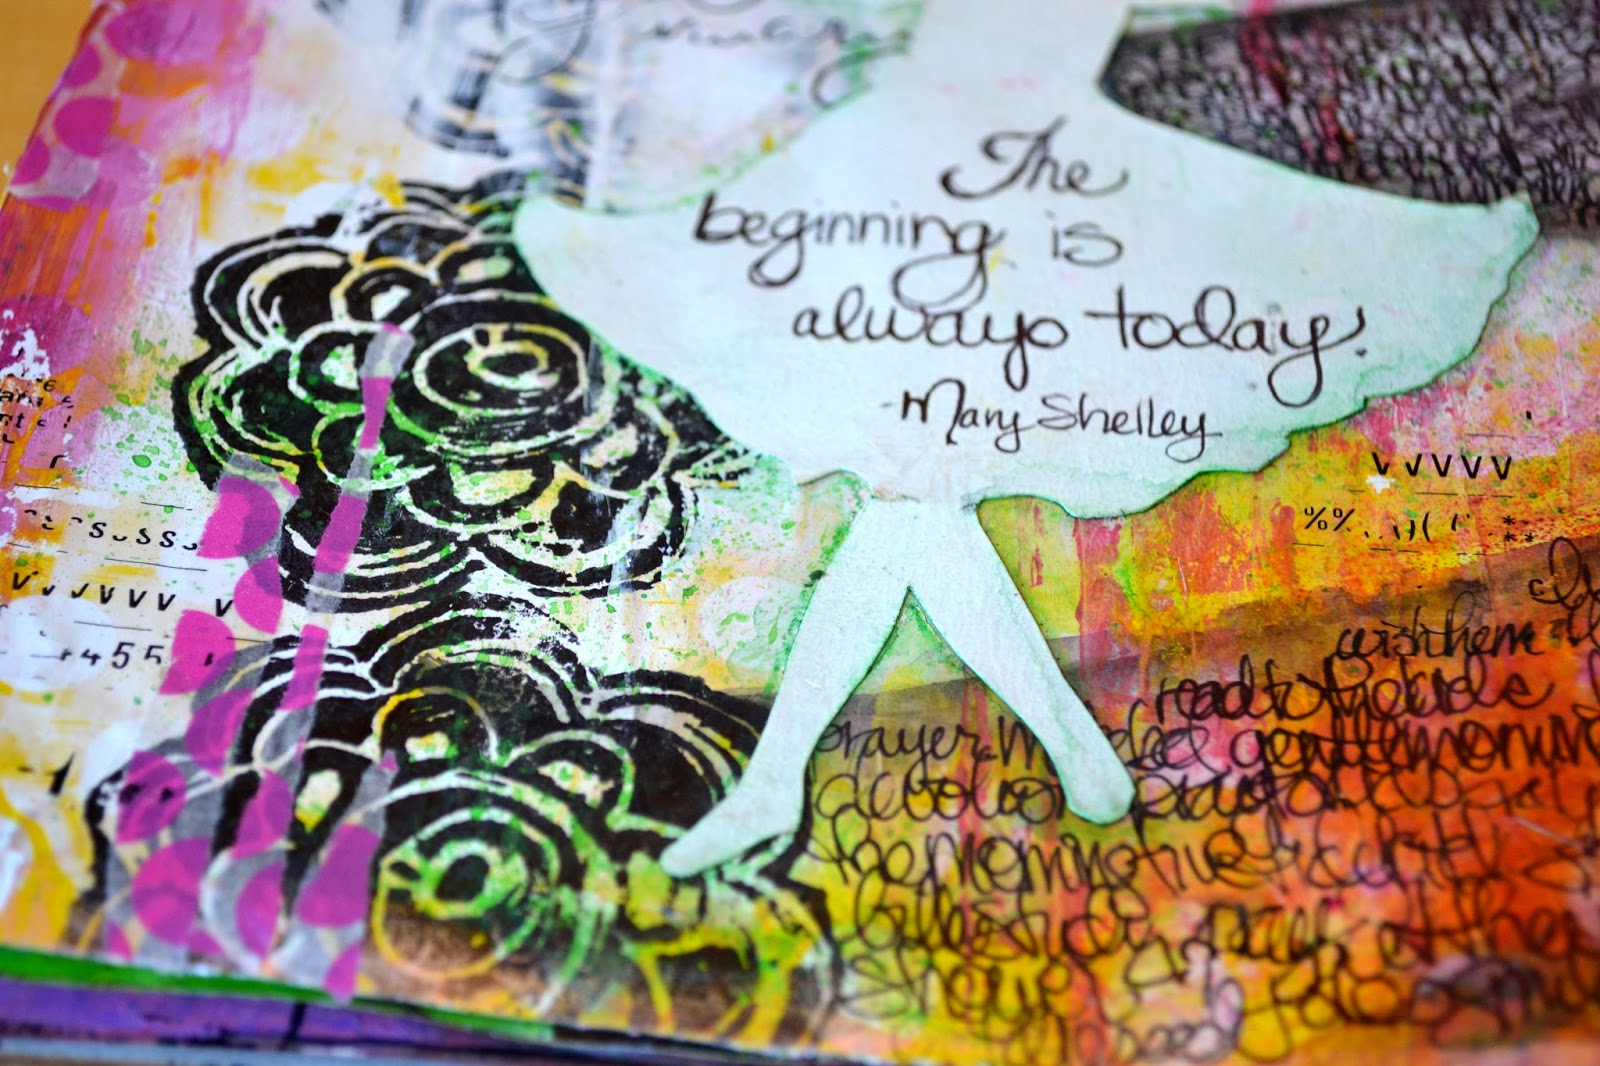
Journal Prompt:  “The beginning is always today.” -Mary Shelley


I chose to go with a path. Each day is the beginning of my daily journey of my life. Instead of fretting about the future, focus on today. If it starts wrong, start over. With reading, memorizing, and meditating on scripture, optimally, to restart the day gone wrong. Sometimes that's the middle of the day for me! 

I think of the scripture Psalm 119:105:

Your word is a lamp to my feet, a light on my path.

Over the years I have come to see how much it helps me if I start my day right with certain rhythms: the word of God lighting my path. There are many aspects to this, so these things I have doodled along my path.


1. See the the white polka dots on the yellow? That's what I put down first on this blank spread: it's gift wrap. Then I applied gesso on the middle areas.

2. Next came the gorgeous, fantabulous rubber stamps that I received as a gift for moderating on the DLP Facebook page! These are designed by Rae, and Roben-Marie sells them in her shop, Paper Bag Studios. I used black Staz-On ink. People, the smell of this ink is fantastic! Maybe a bit strong, but it smells like Christmas to me: almond extract. LOL I sttamped them in a line, from top to bottom. After staring at the page for a few days, totally stuck! I got to the third step:

3. A big blob of black gesso on the stamp was my next trick. I stamped it on the bottom right edge. Oh my. That was a mistake! It looked horrid! So I covered it in gesso a few times, drying between each application. Then I sprayed some Dylusions ink onto that area. There was so much thickness going on with all those layers, that the gesso started to crack, which I LOOOOOVE!! The paper ripped too, so I ripped it further, and added some old watercoloring bubbles I had in my journal stash. I just glued it down directly under the white and yellow polka dot paper, as I hadn't stuck it perfectly down on the page. I like!

Peek-a-boo!


4. I applied some gesso over some of the stamped flowers to tone it down.

4. Next, I went crazy with Gelli-printing. I didn't actually include any of the prints on here, but I removed the access paint from the brayer onto the page. See it there, in the path?

 5. I randomly smudged Viva Inka Gold to the pages, concentrating on the edges. Some areas I left gesso peeking through. You gotta have white space. My style, anyway.

6. Out came my ogee patterned stencil I made a while ago, which I use REGULARLY! See photo below. I applied white modeling paste. Once dry, I applied more of that luscious pink Viva Inka Gold. Forgot to mention I wrote in the wet white gesso on Step 2 with my General's Sketch and Wash pencil. See it below? :)


7. Splattered green in the white and other areas with Necolors2.


8. Rubbed OLD graphic almost-vintage office letter rub-ons randomly in places. They don't work well, so I just grabbed the whole page full of letters and rubbed away. Fun fun!

9. Doodled on the path. Kinda private, so I wrote illegibly. 

10. Next came the girl dancing along the path. Life's a great big dance, in love with life, in love with my Savior, and FREE! And, gloriously, at the end, I will spend an eternity with my God, the creator of heaven and earth. I glued her down with matte medium, and added some dimension with some watercolor pencil on the edges.

11. Almost lastly, I ripped up some fun pink polka dot washi tape, and applied it to the edges and a bit over the stamped flowers.


12. Lastly, I wrote the Shelley quote (who, by the way, wrote the famous classic, Frankenstein) directly on the girl.

Whew! I did it! That was long! On to the next prompt please! :) 


Week 1 of my DLP Art Journal


January Theme
The Blank Page and How to Face It!
January 1
Art Challenge: Book Paper
Journal Prompt: Be Your Own Goal Keeper

I have noticed many art journalers choose a word for the year, so that's what I did here. GROWTH


My planner part is on the right, as you can see. Not much room to add a whole lot of information, so I kept my journaling details brief. I miss the big spaces from last year already! But this is what I have commited to, and I'll stick with it. :)


So the idea was to use book paper as a starting point. Last year at our women's bible study we did a Beth Moore study. With it came a beautiful workbook, full of words and notes. I tore out a page of the book, ripped it into smaller pieces, and glued down with matte medium. I like to doodle to help me concentrate, so the doodles you see here through the paint are mine that I added to the book during the study.


The textures were created with my Necolors2, coloring the whole page with different colors of green crayons, then wetting the entire thing. 

Next, I applied Tulip fabric spray paint rather randomly, and a few other sprays. Occasionally I would wipe excess paint off with a paper towel. 

The letters were stamped with paint, using a foam alphabet stamp set by Magnetic Poetry. I added more watercolor, and doodles to the letters to give it more depth. 


The butterfly is a stencil, which I scraped modeling paste on. Then I sprayed with Prima Bloom spray in yellow. The dark dimension on the sides of the 3D areas of the butterfly are there because the stencil was dirty. LOL


Using a white Signo Uniball gel pen, I added a tangle pattern to the sides of the circle dates. The circle dates are the same I used last year, except this time I colored in the negative part of the numbers. :) 

And there you have it: Week One.

Thanks for visiting!