Showing posts with label gelliprinting. Show all posts

Tuesday, May 24, 2016

May Weeks 3 and 4 in my unPlanner

Back again with more unPlanner pages. I'm starting to think these should all just be art journal pages, instead of a calendar. Not sure I want to write on these!

Go HERE if you want more information or to register for The Documented Life Project 2016: The unPlanner!

Been working like mad on a special project, so my blogging has fallen a bit behind. I'll give you a quick run down of these May pages.

May 15-21


These started as gelliprints. I sat, looking at the designs on the page, wondering how I could add more detail before making journaling spots. Then my mind went to the simplistic artsy flowers I have seen lately on Pinterest and Instagram. Like these designs: Country Flowers by Mia Charro.
I started painting some, and I found that I actually kinda knew how to do this! LOL! 


Lots of accents added with stencils from StencilGirl, namely this amazing set by Mary Beth Shaw!


I added some blending with paint and my fingers too.


Added lots of doodles with black sharpie and white gel pen as well.

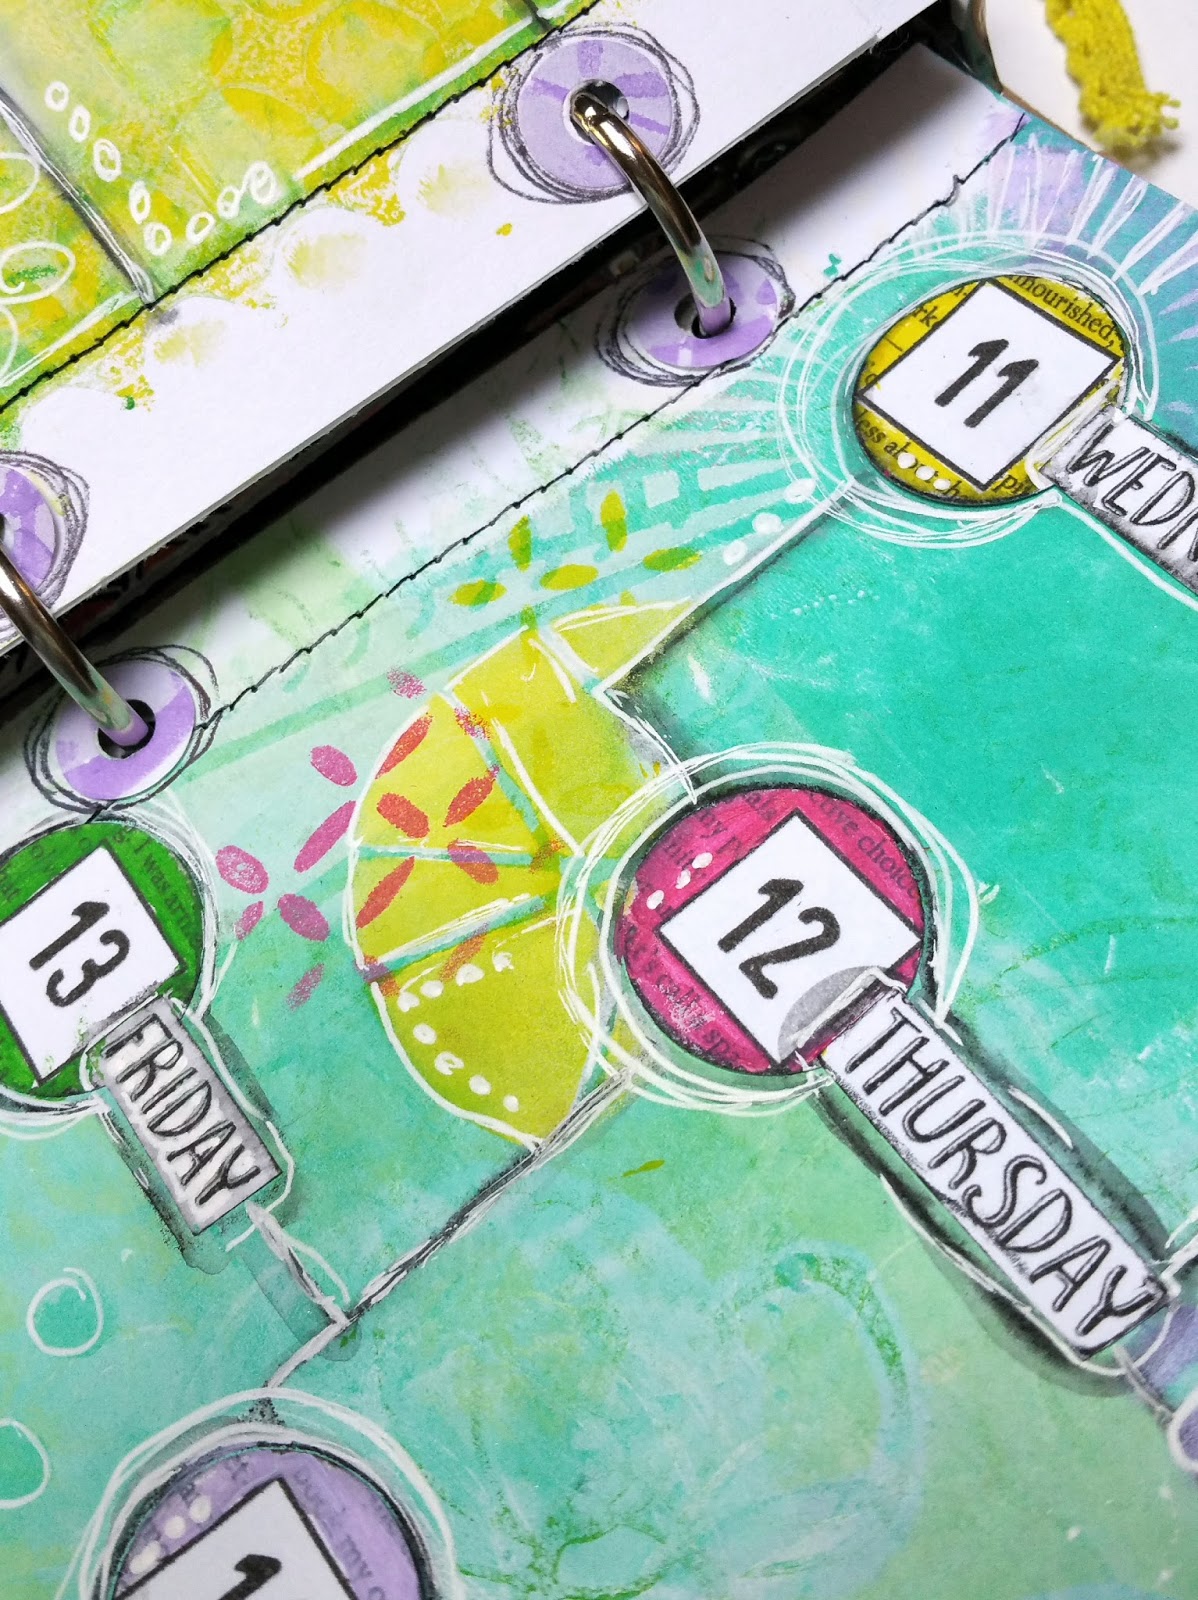
May 22-28


1. I started with two Gelliprints. I used a few stencils for the gelliprinting. Mainly Circles Layer Me by Carolyn Dube and DNA Strands by Mary Beth Shaw.

2. I cut down the papers to fit my binder.
3. To unify the two pages, I pieced a part of the print of the left side to the right page. 

4. I used a handmade flower mask to outline the flower with a black Stabilo All. 

5. I activated the pencil to get a messy look. 

6. I took purple, pink, white and aqua paint and brushed the flower petals and center to add color and layers. 

7. Added some stenciling with a StencilGirl mini stencil to the petals. 


8. Made green circles for "leaves" stemming out from the flower. 

9. Messily scribbled around the flower and doodled circles all over. 

10. Added lines for the days with a black Stabilo All. 

11. Sewed around edges and the lines with black thread. 

12. Added circle days from a printable. 

13. Outlined them with the Stabilo too. 

14. Wrote in the days of the week with a black Pitt pen.


I have a similar tutorial for flowers like these HERE.

And there are two weeks in my unPlanner. I'm a little behind with the challenge part of this project, which I hope to complete next time I post here on the blog. :)\
Thanks so much for visiting!

♥♥♥  Anna  ♥♥♥

Friday, May 13, 2016

May Week Two unPlanner Pages

I'm back again with my unPlanner pages, this time with week two. I just might blog every week if I keep this up! ;)

For more info about this unPlanner project, check out the Art5 website HERE

I kept it simpler this time. Still using the same colors like last week. Same idea as well.


I started with two Gelliprints again, same as last week. My Gelliplate is 8"x10", and I used 8.5"x11" cardstock for the printing, creating a white frame around the print. I took advantage of this and used it as part of my design. I sewed around the edge, following the natural "frame".

I used the same stencils for the gelliprinting as I did in the previous week: the Circles Layer Me and Puddles by StencilGirl.


Next, I added the numbers by Right Brain Planner and days of the week from the Art5 unPlanner Kit.


I outlined and created squares with a black Stabilo All pencil, activating the pencil lines with wet brush. I let it dry. Well, semi-dry. You know how impatient we get...


I painted each date circle with my five colors of paint.


I added stencilling all over the place with StencilGirl stencils.


Layers of stenciling, then added more detail with white gel pen. I first stencilled with gesso, then layered color over the gesso, which helps to make the colors pop more.Makes a big difference, especially for the yellow, as yellow tends to be quite transparent. The purple too.


Left side:


Added gel pen to the black lines and scribbled around the circle dates too.

I painted the white reinforcements with purple, then stencilled with white, purple, white, then purple again.


In the photo below, bottom left corner, there is this fun white design in the background, right? That's the coolest stencil ever. It's called Shattered, designed by Lizzie Mayne.


Here's the right side of the layout:


In top left corner in photo below, is the cool Shattered stencil again.


Had to include a picture of some of the stencils I used. :)


And there it is: Week Two.

For more info about this unPlanner project, check out the Art5 website HERE

In other news, I now have the calendar I use for my unPlanner available to you as a free download. Check that out HERE.

Thanks for stopping by!

♥♥♥  Anna  ♥♥♥

Thursday, May 12, 2016

May, Week One in my unPlanner

Hi, artsy friends! Thanks for stopping by. :)

A new post about my unPlanner, featuring the first few pages.

May has come, and that means a new color scheme in my unPlanner. 

Go HERE if you want more information or to register for The Documented Life Project 2016: The unPlanner!


This Gelliprint is the foundation of all of my pages this month:


The colors I chose came from this inspiration: Lindy's May 2016 Color Challenge. I didn't use any of her products, but I did use the colors in acrylic paint. You can get inspiration anywhere! (I did add pink, as I couldn't leave it out!)  

I went crazy with StencilGirl stencils for the Gelliprint: 


I made about ten different prints in this color scheme, and I used them for my weekly pages.

So here's my calendar. UPDATE: I now have this calendar available to you as a download. Check it out HERE.


A little secret tip: The reason the squiggly squares have thick and thin lines is because after I had drawn in the squares, I painted in the "gutters", and I couldn't stay in the lines. So, to hide the "mistakes" I blacked the areas out with my Sharpie marker. This "OOPS" turned out nice, I think!! :)

For the first week's doodles on my calendar, I used StencilGirl stencils again. Sorry for always mentioning these stencils.....naw...#sorrynotsorry. ;)


The tag? Mmmm...an oldie that needed a home, and it's finally not orphaned any longer. I brushed a Rae Missigman stamp with Zig Clean Color watercolor markers, spritzed the stamp with water, then stamped on watercolor paper. 


For the weekly view, I cut down the Gelliprints and sewed around the edges. 

For this print, I used these stencils:


Next, I printed out the weekly view download from the unPlanner downloads. Then I cut out the day of the week names.

For the circle dates, I used a combination of designs. For the white numbers, I used my own design, I scanned in that first Gelliprint I showed you in this post. (see the first one above). Then I made these cute Gelli dots with a font on my computer in my digital scrapbooking program and created circles, printed them off, and voila! Circle dates! 

To download my circle dates design for your own use, click HERE which is a link to the file in my DropBox. Please be sure to credit me if you use them and share on social media, k? :)

For the square numbers within the book text circle, I downloaded this great art journaling/gluebook resource from Right Brain Planner by Teresa Robinson. Check it out HERE.

Here is the left side. After I glued on all the numbers and dates, I stenciled and smooshed paint around, and added frames for the journaling spots with a black Stabilo All pencil.

 I also added more depth with some outlining of some of the shapes I made with stencils.

The stencils I used are mostly from the April StencilGirl club stencils. They came in a 9x12 sheet, which I cut down. 12 cute little designs on this sheet. I love them all!

I added paint through stencils, added white, then more color. Lots of layers.


Add white gel pen scribbles in areas to add more dimension again. 

Around the stencilled shapes.

Around edges of the journaling strips.

Over the black outlined areas of the circle dates, the reinforcements, etc.

Keep adding details, and you'll be amazed at the depth and interested in brings to your project!

See the white lines around the "diamond" shapes?


And here's the two-page spread.


And I call it done! Next week I hope to make my PAC.


Thanks for visiting. I appreciate comments and questions, letting me know you've been here. :)

♥♥♥  Anna  ♥♥♥


Tuesday, May 3, 2016

April in my unPlanner Part 02


Hello, peeps! Thanks for stopping by. Sharing my unPlanner pages tonight. 

For this week, I started with printing off the unPlanner blank weekly view download on white cardstock. 

Edit: I have added in a few more pages that I forgot to include in this post.

For this weekly view, I covered the pages with yellow paint, added swirls of other colors, stencilled with a StencilGirl number set, then dots using this awesome grafitti look stencil by Seth Apter. Stitching in black circles when completed.


I outlined each stencilled number with a white gel pen to bring out the numbers more. Now I have to journal on top of this. It'll be hard to cover up those numbers, I think!


 To see a tutorial of the page below on the left, go visit the StencilGirl Talk blog. It was one of the projects for my guest designer post there.


For the Week 2 PAC challenge, I added a high contrast black and white photocopy of my own face, stencilled on top of it in areas, did some doodling and of course, funky sewing.


April 17-23 Weekly view: I randomly brushed red paint on the card stock.

Next, I drew 7 circles randomly with a black Stabilo Marks All pencil. 

I handpainted the circles with white, orange and pink very loosely.


Then I stencilled pink paint through this awesome stencil by Mary Beth Shaw from StencilGirl. Basically covered the whole page with it in a very imperfect way, not worrying about lining things up, going around the circles. During this process, the stencil accidentally dipped into my pink paint palette and I didn't notice until I saw stray paint on areas of the page. Instead of having a hissy fit (teehee!) I chose to go with it. Peace, sisters, peace! ;)  


When everything was dry, I sewed messy circles with metallic orange thread loosely, doing the edges of the pages as well.

And again, I made watercolor bubbles for the reinforcement spine on a separate piece of watercolor paper, cut into strips, and glued to each edge of the weekly view.


Next, I took another stencil, this one by Suzi Dennis, from StencilGirl, and stamped white paint onto the circles, keeping to the edges in a curved shape.


For the dates, I punched out circles from a Gelliprint, doodling the numbers and an outline with a black pen. Filled in the numbers with a white gel pen. 

See HERE for more of my Gelliprinting projects if you are curious what they are. Careful, the link will lead you to a brand new hobby and it's addicting. Can't say I didn't warn you! ;)


For the final week of April, I used the same strategy for the weekly views, except with different stencils for the background, and a slightly different color emphasis.

I also added a "junqueartflower", which I learned to make in that Artsydori class I keep talking about by Cindy Gilstrap. Check our her blog HERE.


This wasn't one of the challenges for DLP, but I printed off a Yes Please list to document sweet family time we had on the weekend. I added some funky black flowers made out of cardstock and painted for the edge. For the edge this time, I stenciled in some fun designs using StencilGirl stencils.


For the Dare2B challenge, I just repeated my first one: Reliant on God. This is what I want to focus on the most in my spiritual walk with the Lord. Added some doodling, stenciling, and sewing for fun.


Some fun doodling on the edge on left page. :) 


.For the list Ten, I listed the ten people I would choose to have a round-table visit with. I chose people past or present.

For the background, I took a picture of the fabric I had designed to make an Artsydori, (see the end of THIS post to see) copied it to the computer, and printed it on cardstock. Voila. Pretty background. 

I added a yellow mini pom pom lace edge, and backed the whole page with a scalloped BoBunny kraft page, adding doodling, and some paint for more detail.


I made another copy of the flowers, and cut them out, and glued it to the back of the last weekly view, on top of a circle I painted and cut into a circle, with sewn edging.


Week 16 PAC, was to make a little pocket, which I did using scraps from a page I wasn't using (scroll down a little further where I explain it), and added sweet little photos from our nature walk on the weekend.


PAC Week 17 was to add numbers, so I simply wrote in a curve a song with a number in the title. I picked a song that is one of my favorites, and quite by accident, I was listening to this song a lot at the exact time I needed to come up with a numbers idea. :) 

While working on a weekly view, something didn't look right (can't remember what), so I redid the weekly but saved the old one and used it for this!    Wahoo! 


 PAC Week 18 was to use a color I normally avoid, and for me hands down, that is Vermillion, a warm red. I used Rae Missigmans's Puddles stencil on an almost-discarded Gelliprint I was using as underpaper. Added some more stenciling with Carolyn Dube's Circles Layer Me stencil.

Added some little dots in a row with a paint pen.

I used a narrow white ribbon, stitched pink thread along the middle, and pulled up the thread too ruffle the ribbon. 


And just for fun, a little flower, stenciled and doodled to decorate the back of the page protector where the PACS are homed.


And that is the end of my April pages. The day got too late to video a flip-through, but I hope to find some time tomorrow or later in the week to do that. I'll add it to this post, I think. 

To see the first part of my April pages in my unPlanner, go HERE.

If you would like more information about this whole unPlanner, please check out this amazing project by the Art to the 5th artists HERE! :)

Thanks so much for visiting, friends!

Have you entered my giveway yet? You still have some time! Deadline is Friday, May 6th, around noon. See HERE!

♥♥♥  Anna  ♥♥♥